


TThe release of the next Ubuntu 20.04 “Focal Fossa” in the long term is fast approaching. But before the stable version, we can still install and try Ubuntu Linux by downloading Ubuntu 20.04 LTS Daily Builds.
To install Ubuntu on macOS, Linux or Windows, we can double start Ubuntu with any operating system. Since we are using the development version, it is strongly recommended not to use it for production. Therefore, a virtual machine is an alternative solution to install and test all the new features of Ubuntu 20.04. However, I will also be writing a separate article on dual booting Windows 10 and Ubuntu.
In this article, I will guide you to install Ubuntu by creating a virtual machine on Windows 10, Linux or macOS. To do the same, we will download and install the daily versions of Ubuntu 20.04 ISO in VirtualBox. So let’s go to the Ubuntu installation guide.
Install Ubuntu 20.04 on VirtualBox
To understand and implement each Ubuntu installation action, follow the step-by-step instructions below:
1. Download the ISO image of VirtualBox and Ubuntu 20.04
The first step requires downloading a virtual machine and an Ubuntu ISO for your operating system. Here we are going to download VirtualBox – free and open-source software for creating virtual machines. You can also download other software like VMWare.
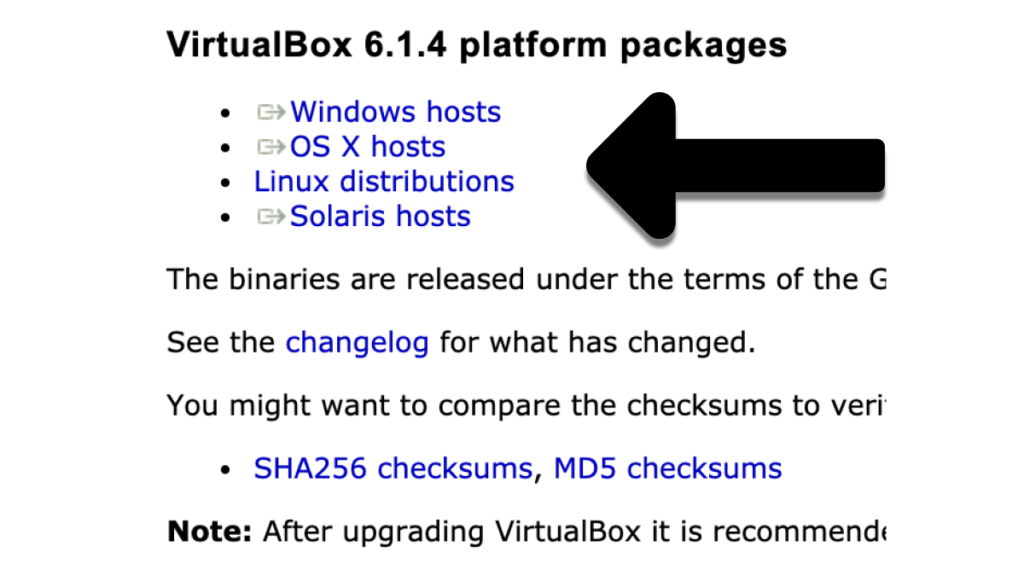
Go to the official VirtualBox website and download the latest version. Make sure you choose the package for your hosting systems such as Windows, macOS or Linux.
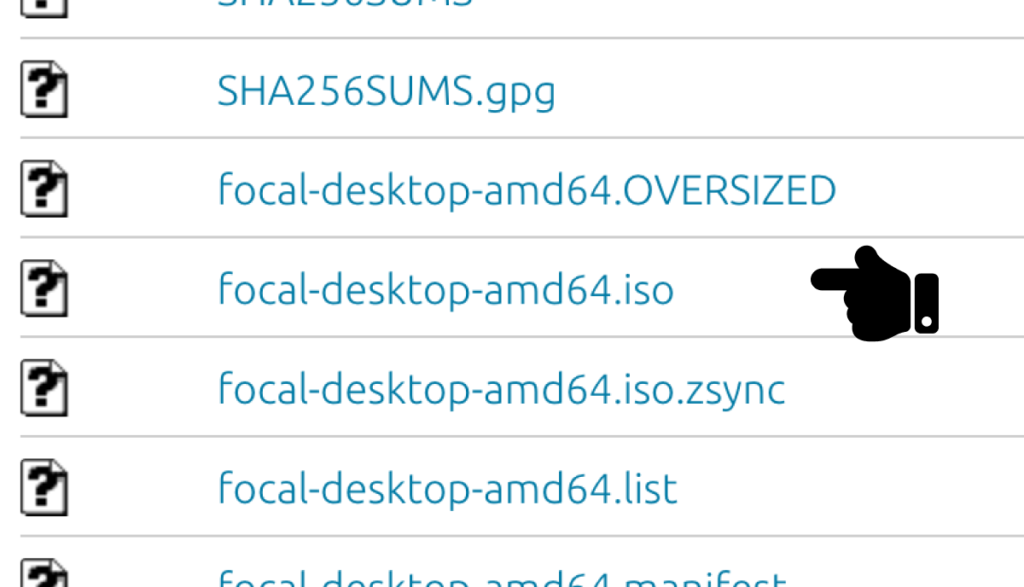
Then download the development version of Ubuntu 20.04 LTS from their live image repository here. The images are available for AMD64 and ARM architectures, so choose the file ending with the extension .ISO.

2. Install VirtualBox and create an Ubuntu virtual machine
After the ISO download of VirtualBox and Ubuntu, we will create an Ubuntu virtual machine. But before that we also need to install VirtualBox on the current operating system.
The installation of VirtualBox follows the same process on all operating systems. Therefore, whether you are using macOS, Linux or Windows, simply open the downloaded VirtualBox package and continue with the configuration of VirtualBox.
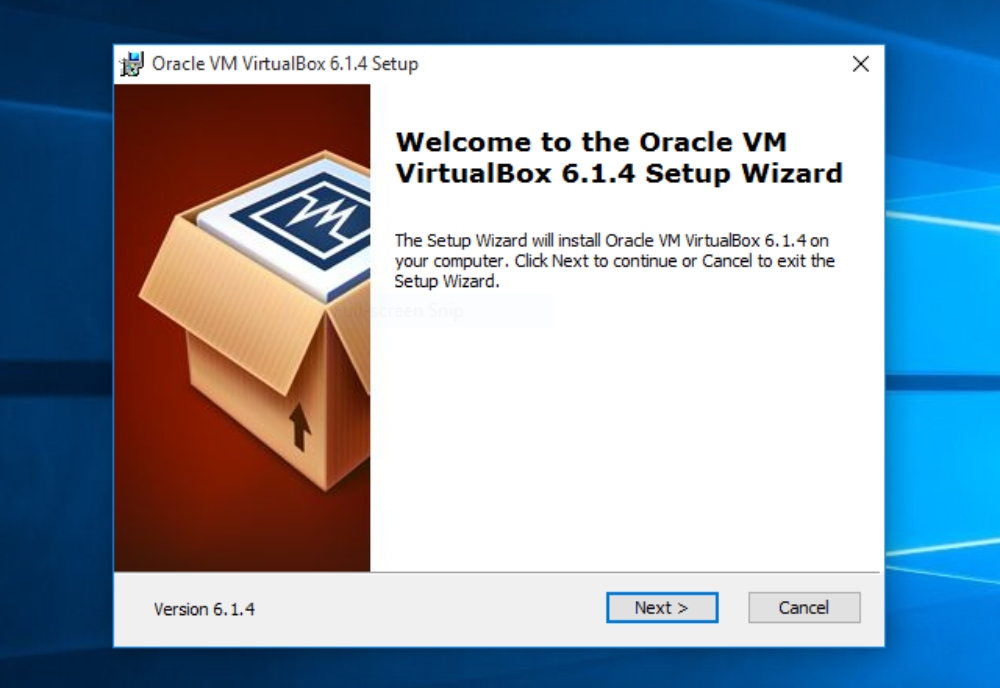
On each window of the wizard, you have nothing to do but click on the next one and keep the default setting checked. The installation will finish in two minutes and you’re ready for the second part, which is creating a virtual machine for Ubuntu.
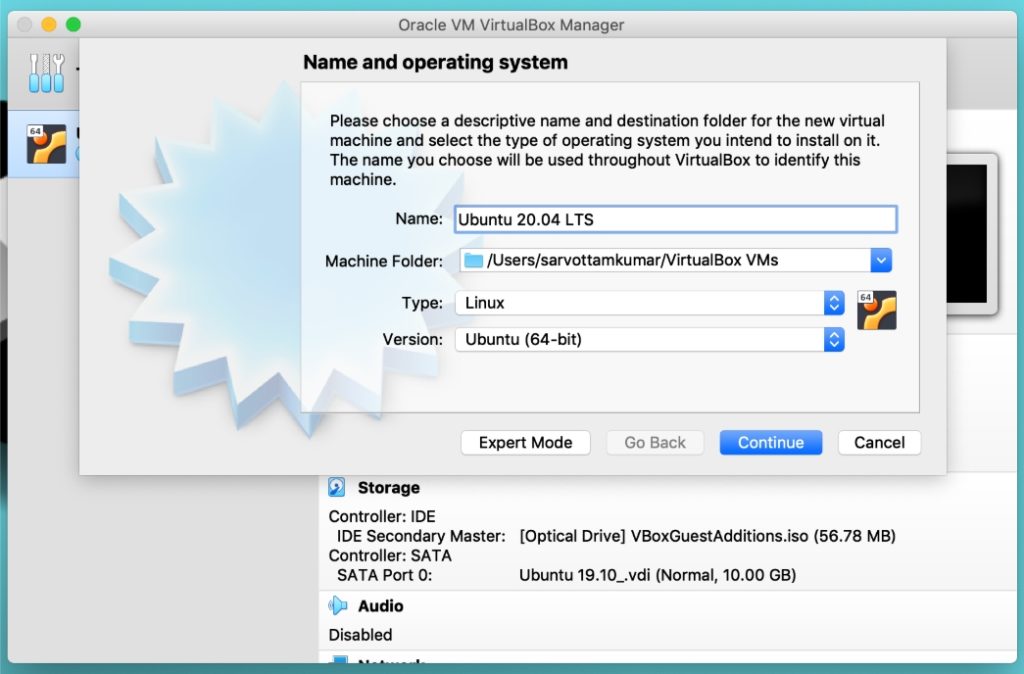
I hope you have correctly configured your VirtualBox. Now open the application and you will notice a symbol indicating “New”. Click on the same symbol or use the keyboard shortcut CTRL + N to create a new virtual instance.

Enter a new name for your operating system in a prompt window. When you type the name, VirtualBox will automatically detect the type and version of your operating system. However, you can also change it later.
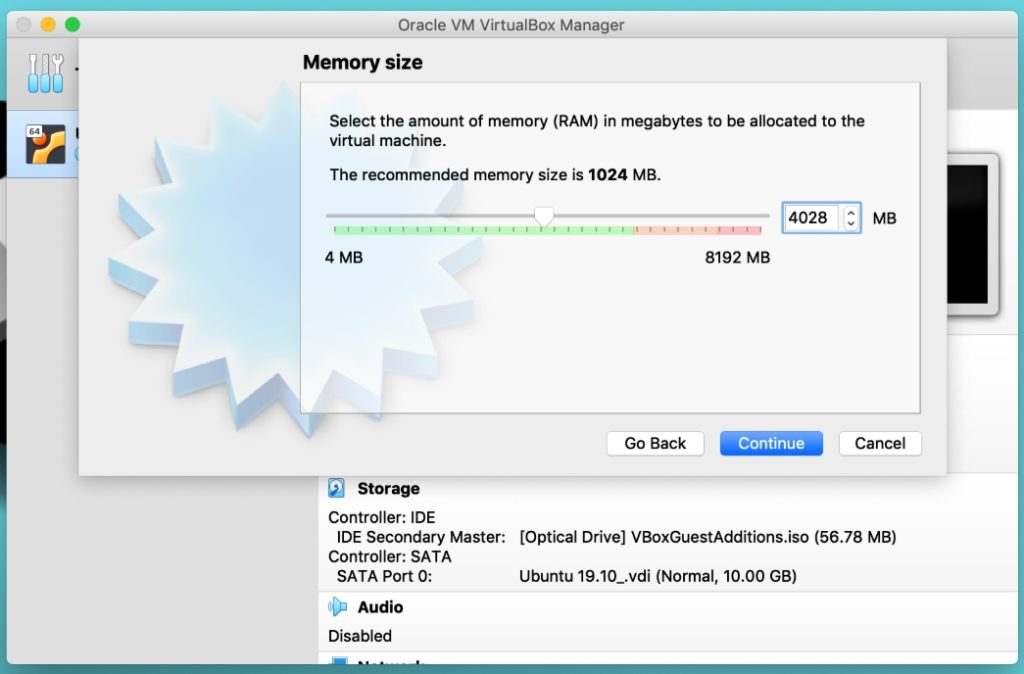
We will now follow the “continue” process. So click on continue and go to the next step to select the RAM size. Here you need to choose the base memory according to the size of the RAM of your host system. For example, if your host system has 8 GB or 4 GB of RAM, you should select half of it (4 GB or 2 GB) for best performance. However, it is strongly recommended not to choose less than 1 GB.
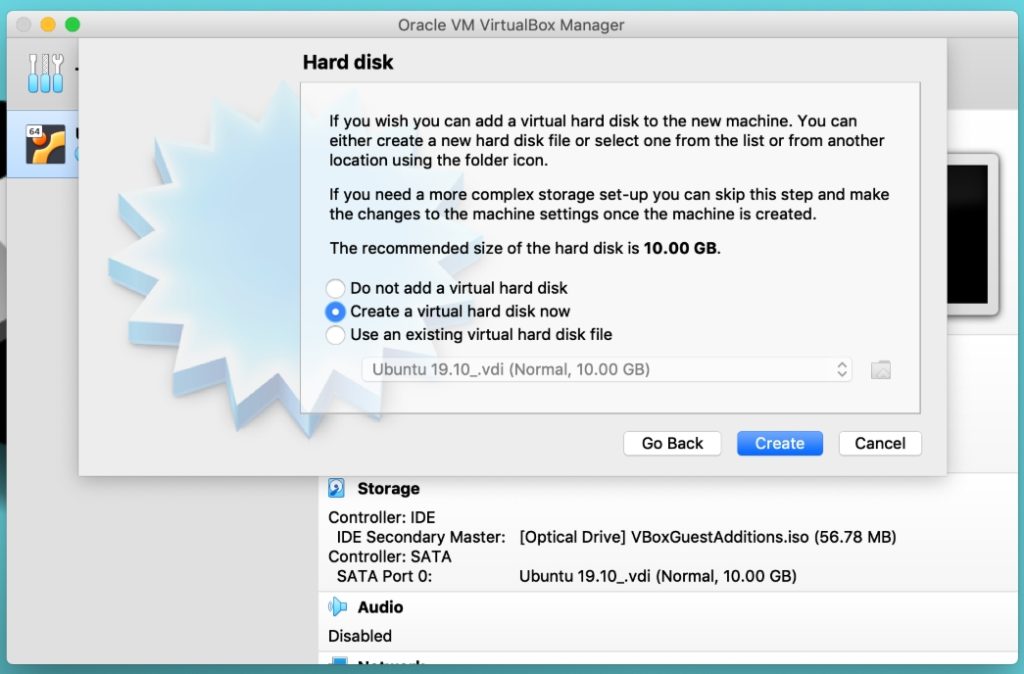
Have you finished the memory space? Now continue to allocate space for virtual hard disks. Virtual disks act as a separate hard drive for virtual machines residing on the host system’s hard drive.
You can also choose an existing virtual hard drive, but I would recommend creating new disk space for Ubuntu virtual machines.
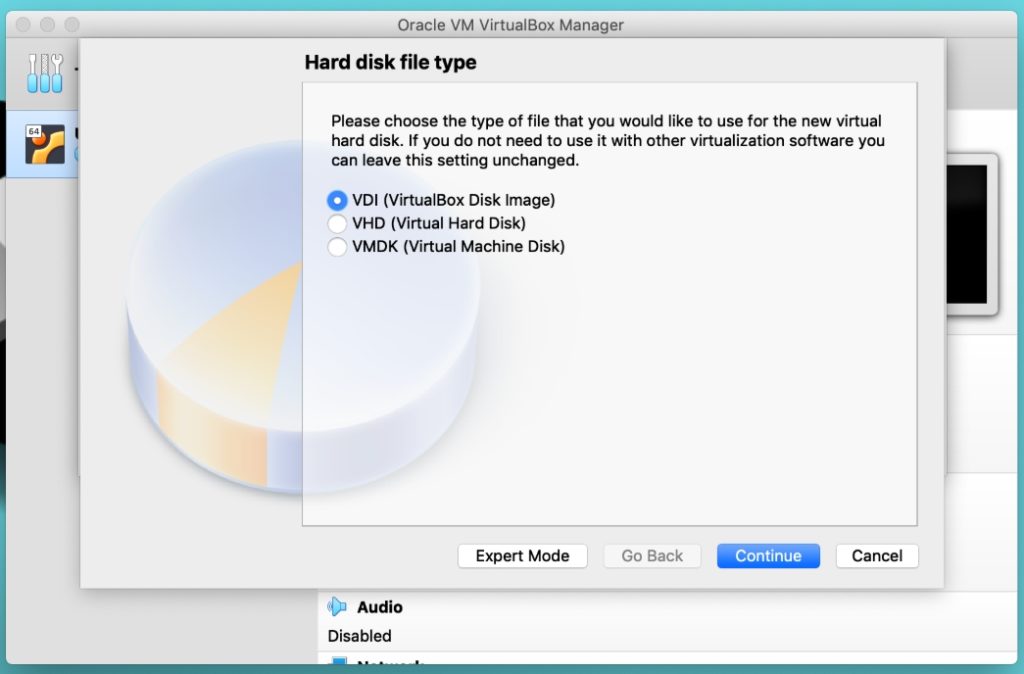
After creating a virtual disk, the following window prompts you to select the file type. It decides how to store your virtual machine in a file. I select VDI which is the native file format of VirtualBox. It creates a single .VDI file and stores an entire virtual operating system.
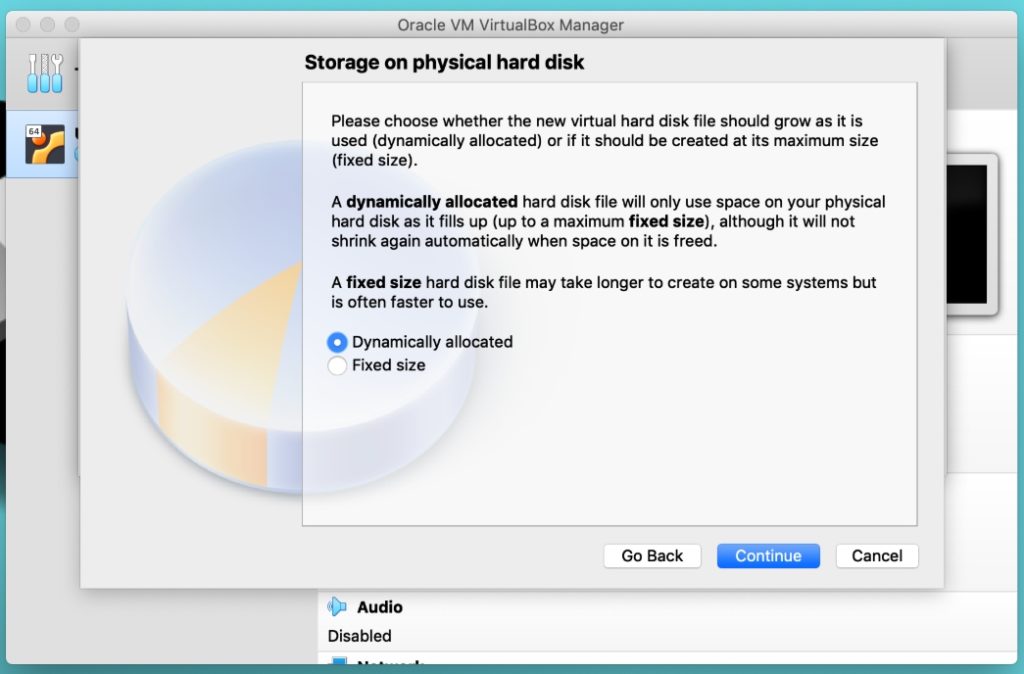
Here’s how to decide the scalability of your virtual hard drive. In the future, if you want to increase your disk space, dynamic allocation may allow you to do so. But if you select a fixed size, you cannot add additional space after creating a virtual machine.
Of course, we would select a “dynamically allocated” option to mount more space at a later stage.
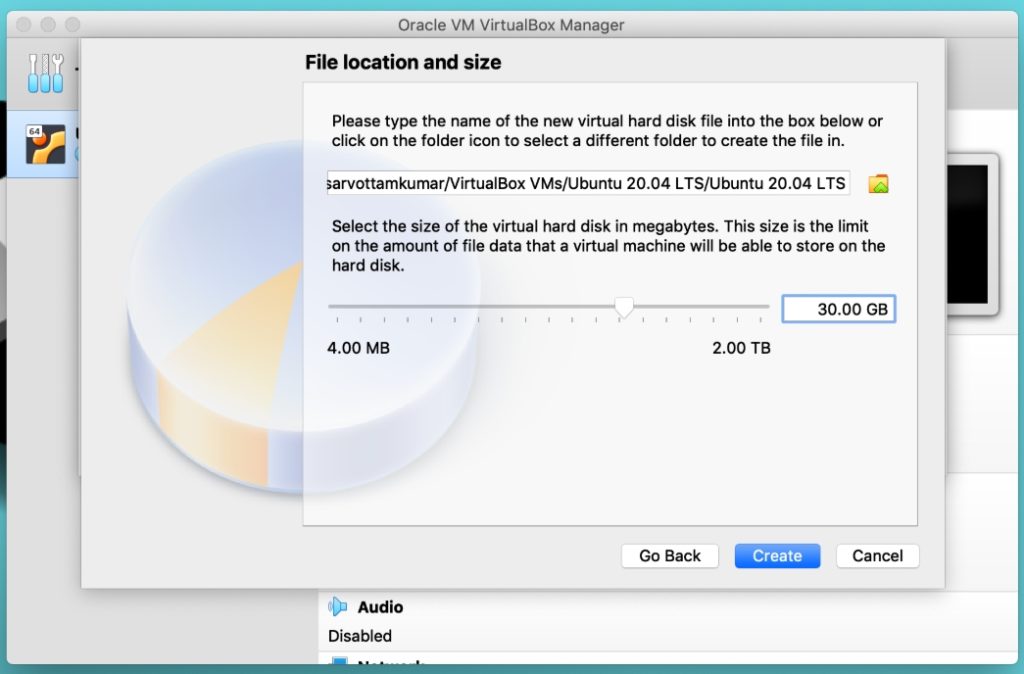
Since we have selected the VDI file type, we now need to store this unique file on our host system. Select the path you want to store and allocate the size according to your needs. Ubuntu recommends at least 25 GB of free storage for smooth operation, therefore, I will choose 30 GB. If you have more space and plan to use it for the long term, you can select more than 30 GB.

Don’t worry about the size here either; we can increase or decrease the size of the hard drive because we have already selected dynamic allocation in the above step.
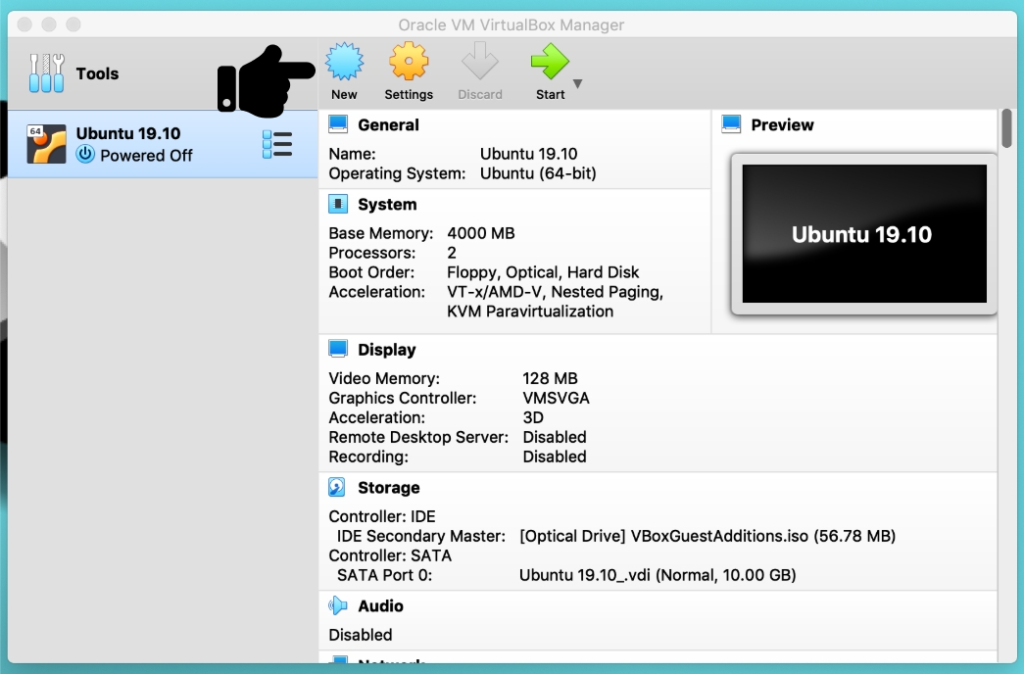
Click create and your virtual machine is now created. On the right side you can check all the settings and system information of your device.
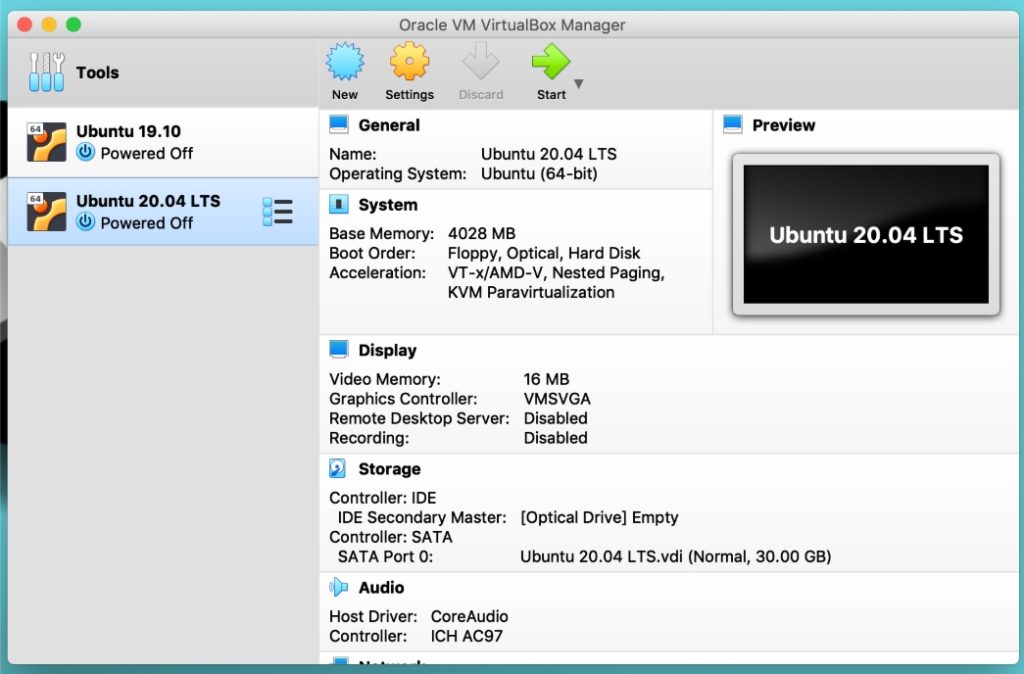
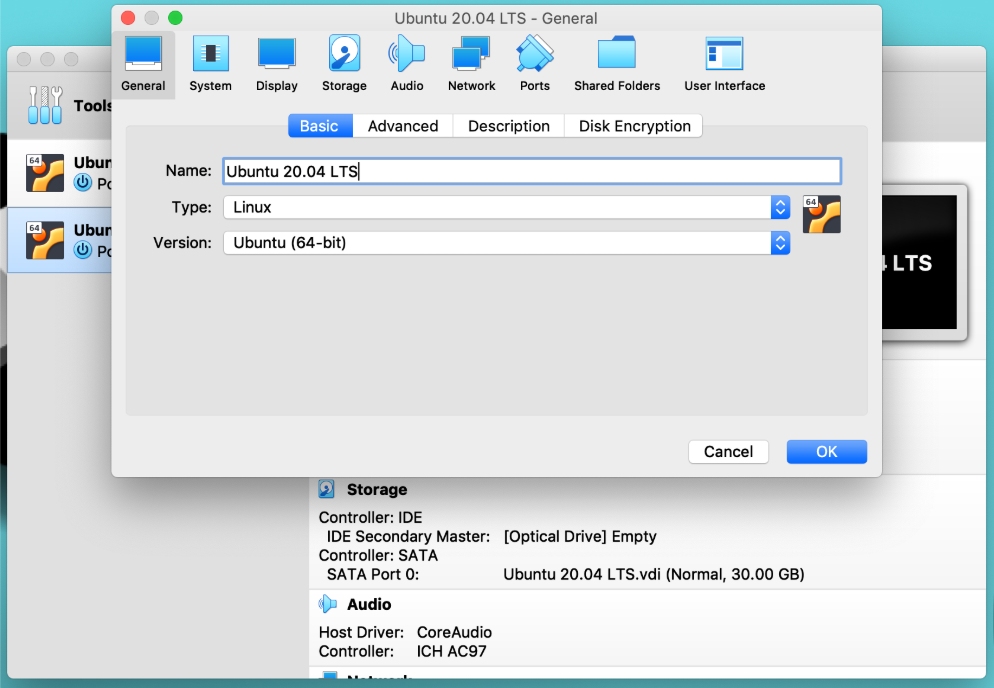
Did you write the name of the misspelled operating system or do you want to rename it? Click on the settings next to the new icon and a window will appear where you can customize all of your system information. But for now, we’re leaving with the default setting.
3. Load the Ubuntu 20.04 ISO file in the virtual machine
We have created a virtual machine, but this still requires a step to start installing Ubuntu on this virtual machine. So, in this step, we will load the Ubuntu ISO file.
Go to the storage section, then click the disk icon to import the downloaded Ubuntu 20.04 image.
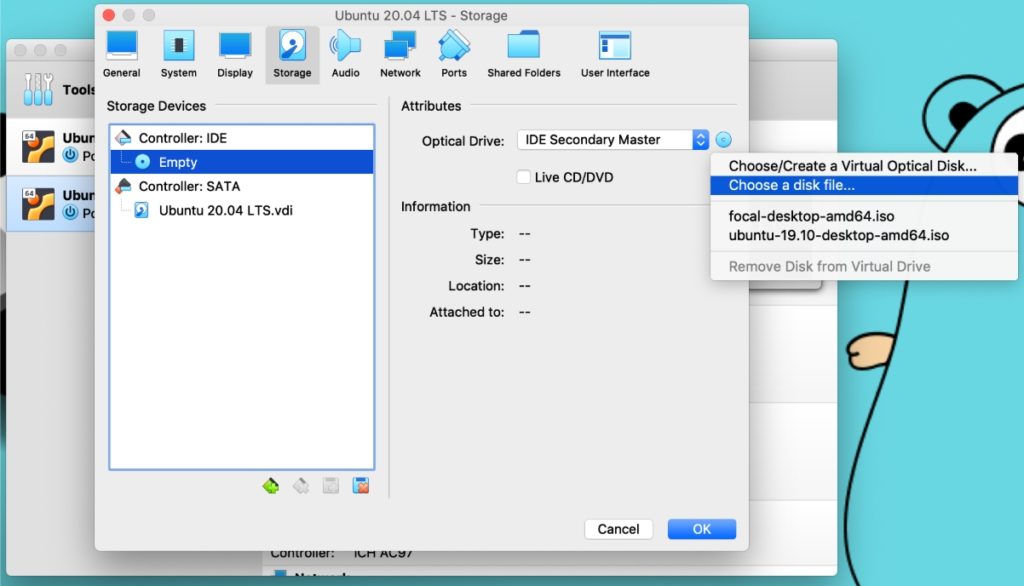
When you click “choose a disk file”, a file dialog opens. Select the Ubuntu ISO in the dialog box and load it into your virtual machine. Click OK to save everything and we are now ready to start installing Ubuntu.
4. Installation of Ubuntu in a virtual machine (VM)
We have now reached the last stage. So, tap on the Start button or double-click on the Ubuntu virtual machine on the left to start the VM.
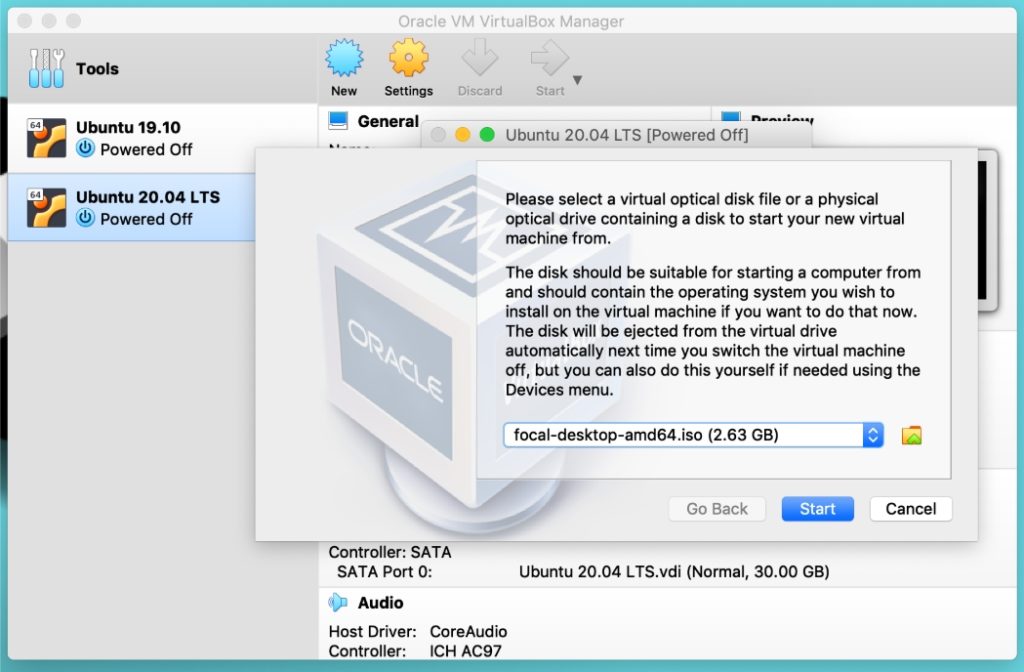
If you experience the situation mentioned in the image above, make sure it displays the ISO file you loaded in step 3. This is just another method to load or change the Ubuntu ISO image. To switch to another ISO, you can click on the small folder icon and replace the current one with a new one.
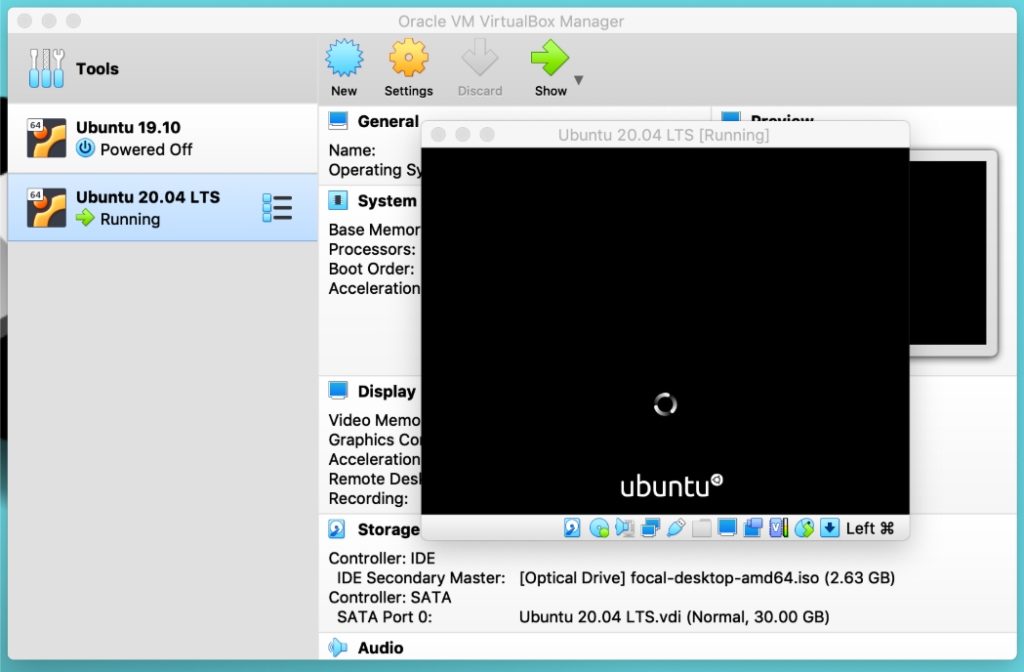
Now click on the Start button and you will notice a black and white screen with an animated wheel and the Ubuntu logo at the bottom. This means that your Ubuntu installer is about to start.
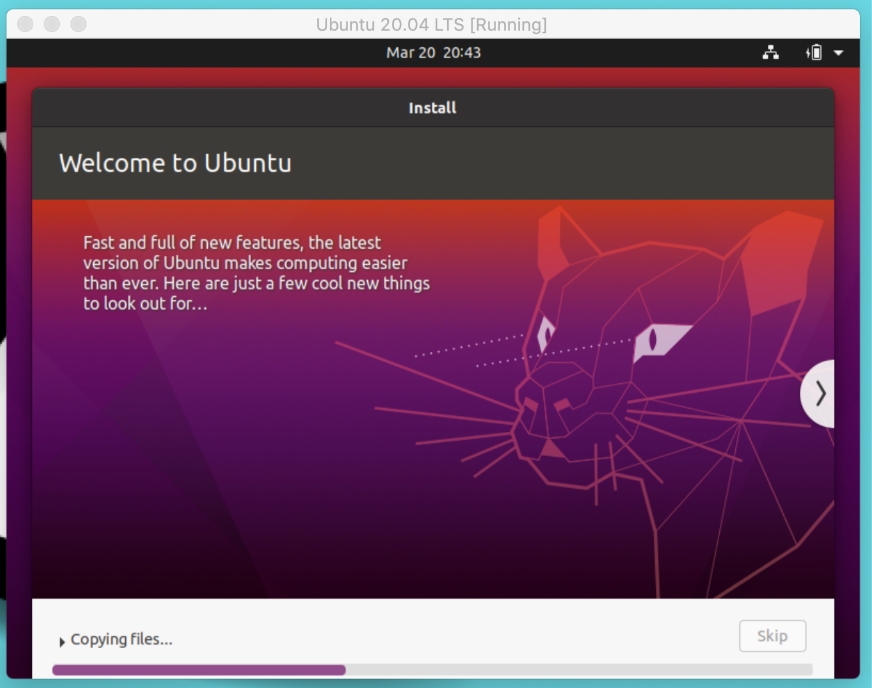
After a few seconds or a minute, the Ubuntu installer will display two options to continue. Let me briefly explain both.

“Try Ubuntu” leads directly to the desktop and gives an overview of the operating system. You can choose this option if you plan to install Ubuntu later but just want to test the temporary version. However, Ubuntu offers a launcher icon named “Install Ubuntu 20.04 LTS” to start the installation from the desktop.
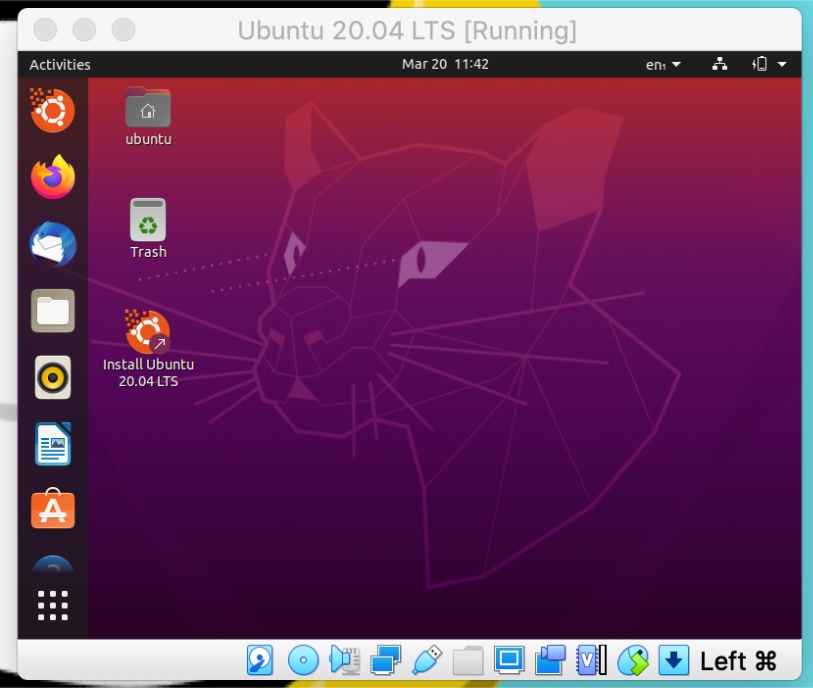
On the other side, “Install Ubuntu” follows the path of permanent installation.
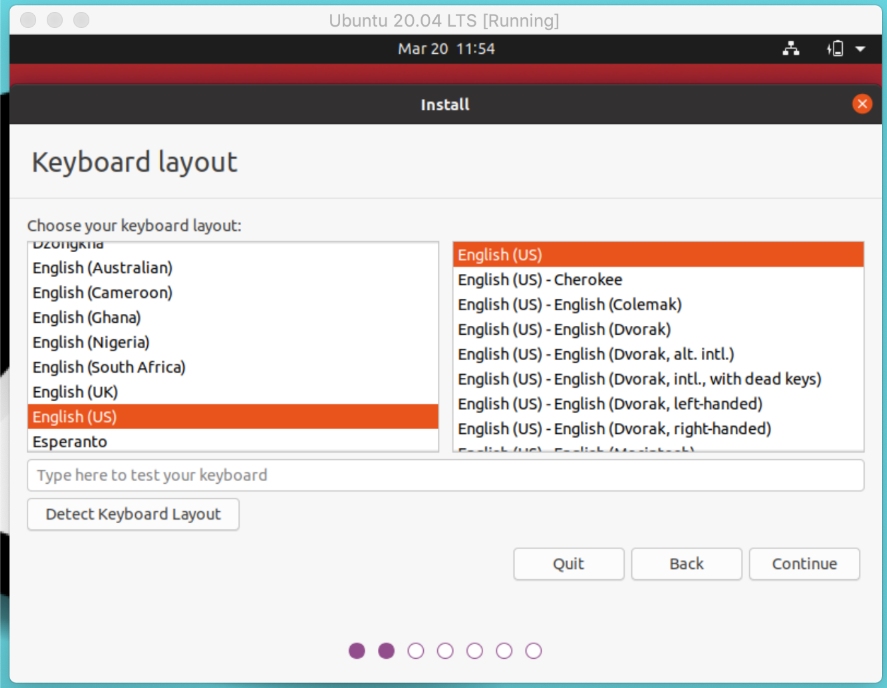
So here we are going to choose “Install Ubuntu” and continue the installation process. On the first screen, choose the keyboard layout for your native language.
The next window allows you to choose between normal and minimum installation. If you are trying Linux for the first time, I guess you may not know what the two mean. Let me explain briefly.
In the minimum installation, you get only the selected applications while the normal installation includes almost all software and tools.
So if you have enough space, I suggest choosing a normal installation to preload games, media players, and utilities. And if you are connected to the Internet, be sure to check the other options. It will make your job easier by installing all the multimedia drivers and codecs required during installation.

Here is the main part of choosing the type of installation that decides the Ubuntu disk partition. Before choosing between these options, first of all, I would say to do nothing before saying to choose because I will explain and show you what each option does. So just read the following paragraphs.
“Erase the disk and install Ubuntu” is an easy path to follow, especially if you are a beginner. It automatically creates a partition table so you escape the hardest part (most people think so). Clicking “Install Now” prompts the authorization dialog to write the changes to the disks and create an automatic partition table.

But “something else” can be a difficult road for beginners. Choosing this option means that you must manually create the root partition, home, swap. This is the reason why most people find it confusing to configure Linux space allocation and partitioning schemes.
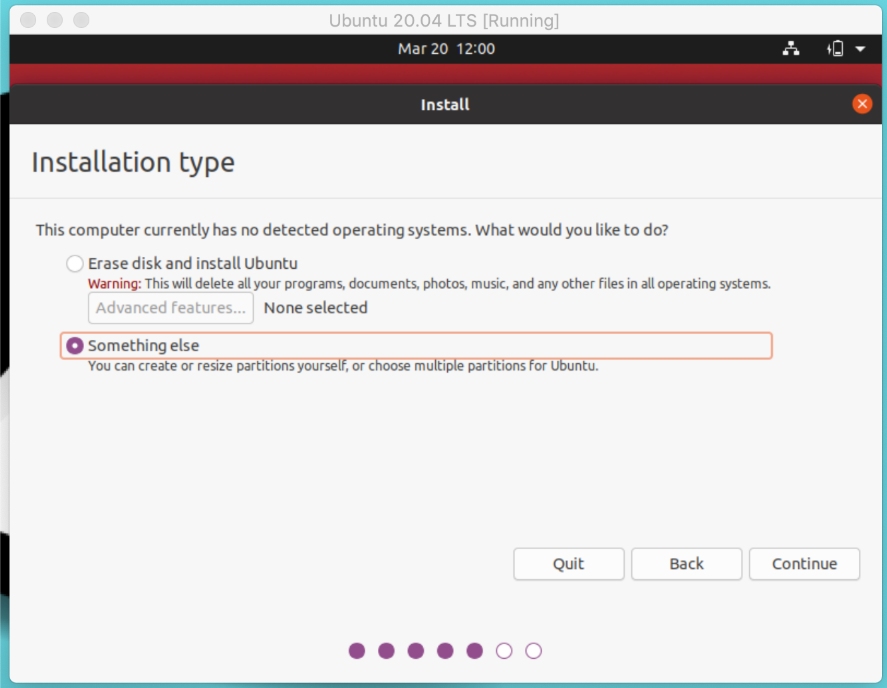
So, if you are a complete beginner, you can now choose “erase the disc” and move on with a simple step.
But if you’re here to learn, choose “something else” and follow step 4. “erase the disc”, people can skip step 4 because it is not for them.
5. Creation of a partitioning scheme for Ubuntu (optional)
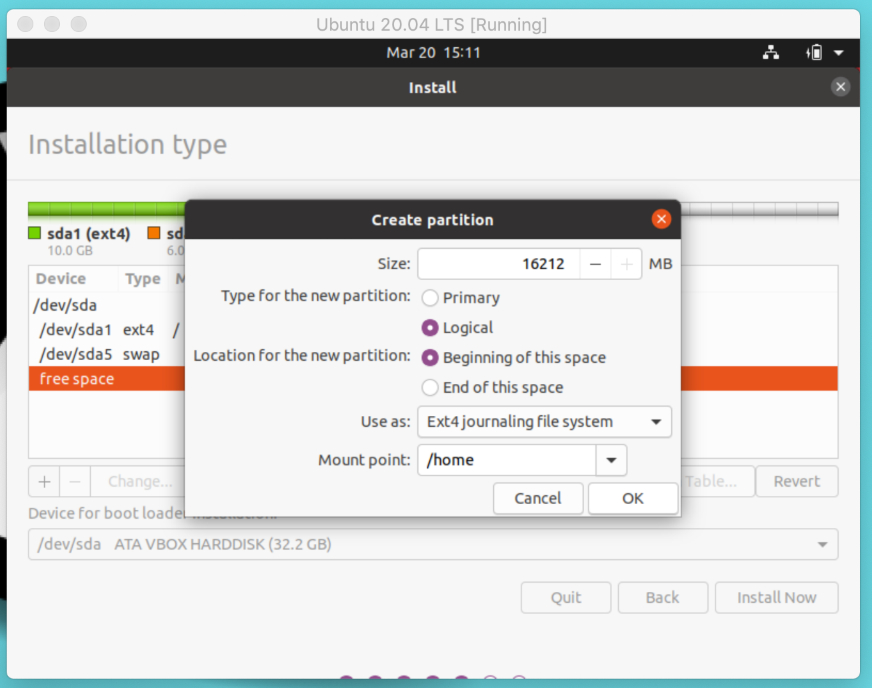
If you chose “something else”, this step is for you. Here we will only create three partitions: / root, / home and / swap. You can also create other partitions like / mnt. But these three are the most important, so let’s create first.
Select the free space and click on the “+” to add configuration values. First create a root partition with the values given in the image.
Here, I want to clarify that for each partition, I select a standard size. You are entirely free to modify the size according to yourself or to follow as indicated on the image.
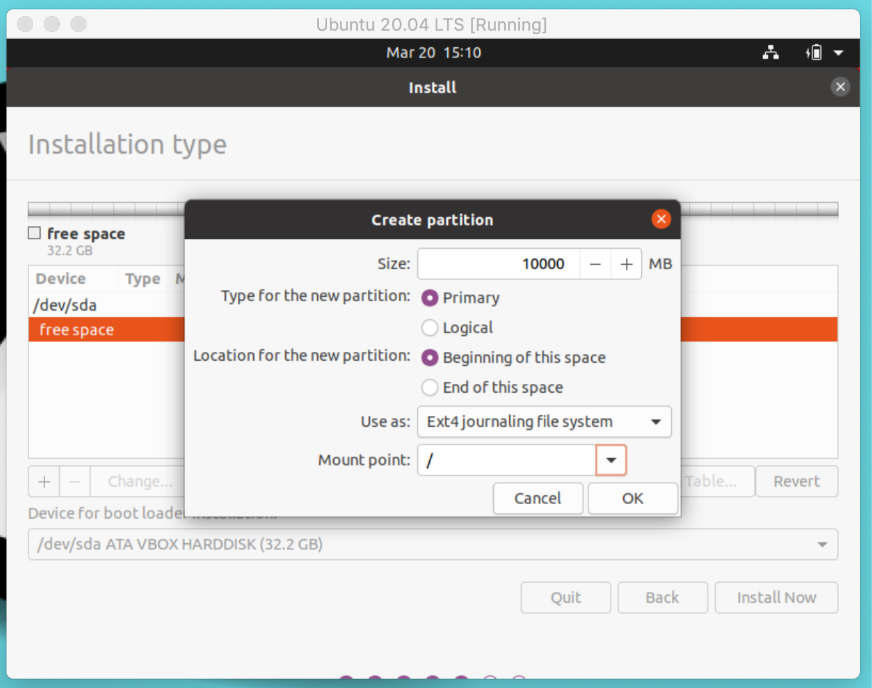
If you do not know, root is a top-level directory in the Linux file system on which the other partitions are mounted. Next, create a swap area that acts like virtual RAM.
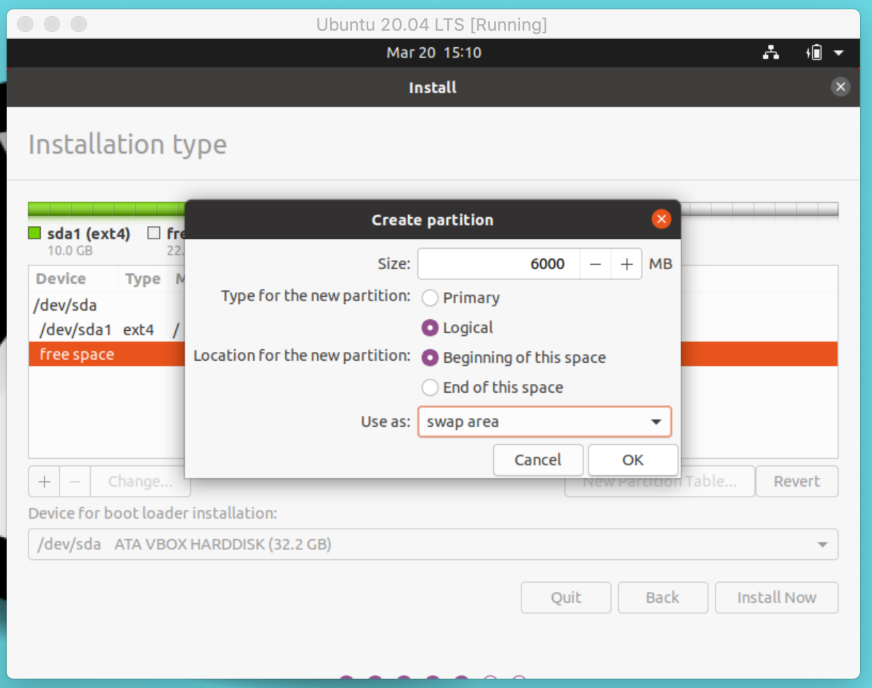
Finally, create a home partition that will be your home directory for storing files and folders.
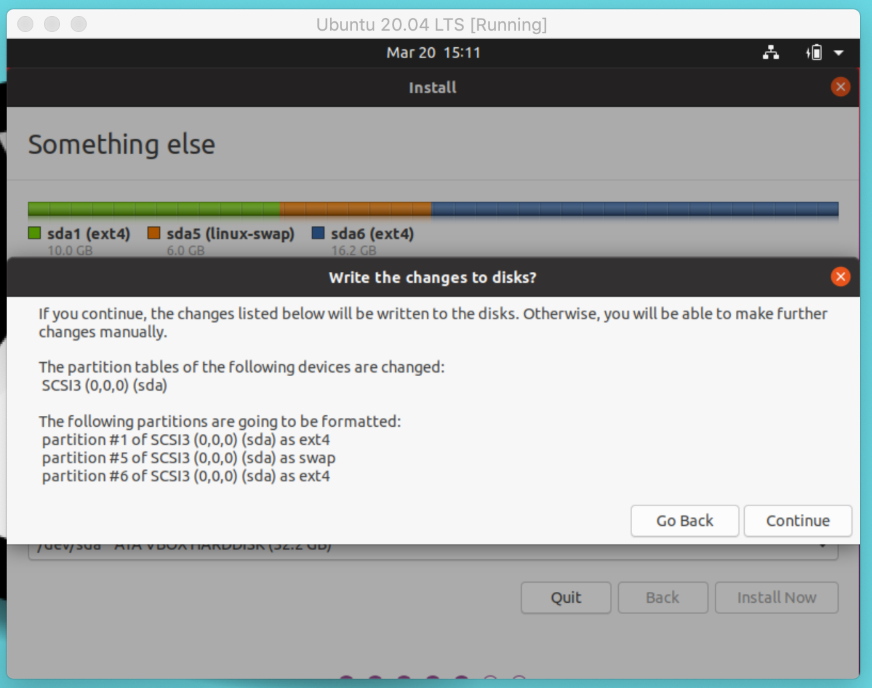
We are done with the partition table. Now click on install now and continue after writing these changes to the discs.
6. General parameters and installation start
I hope that people “something else” and “erase the disk” will successfully reach this stage. This step involves configuring a virtual machine with basic configurations.
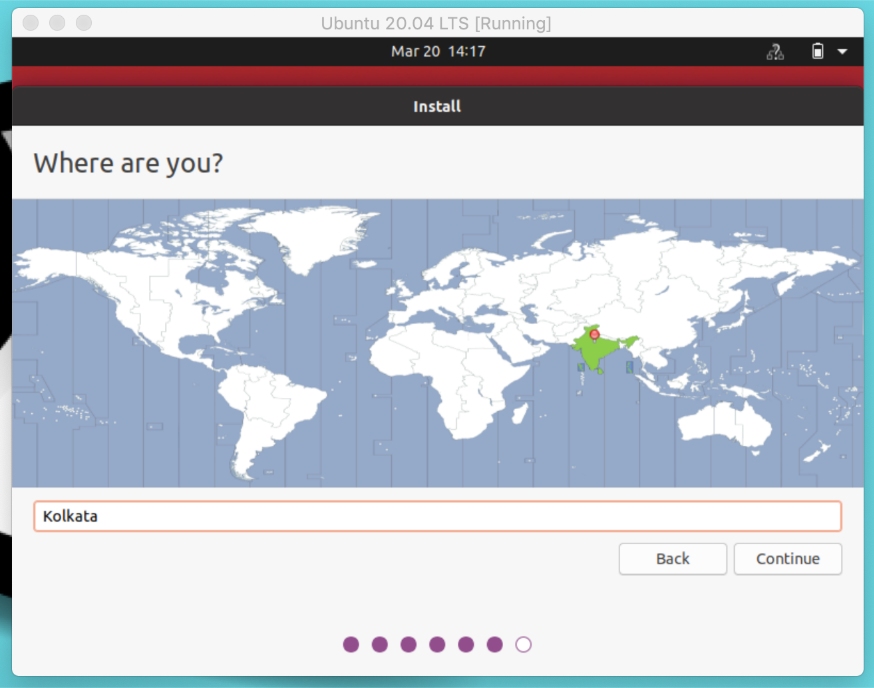
If you are connected to the Internet, the Ubuntu installer will automatically detect and set your location. You can modify it using a card or an input field.
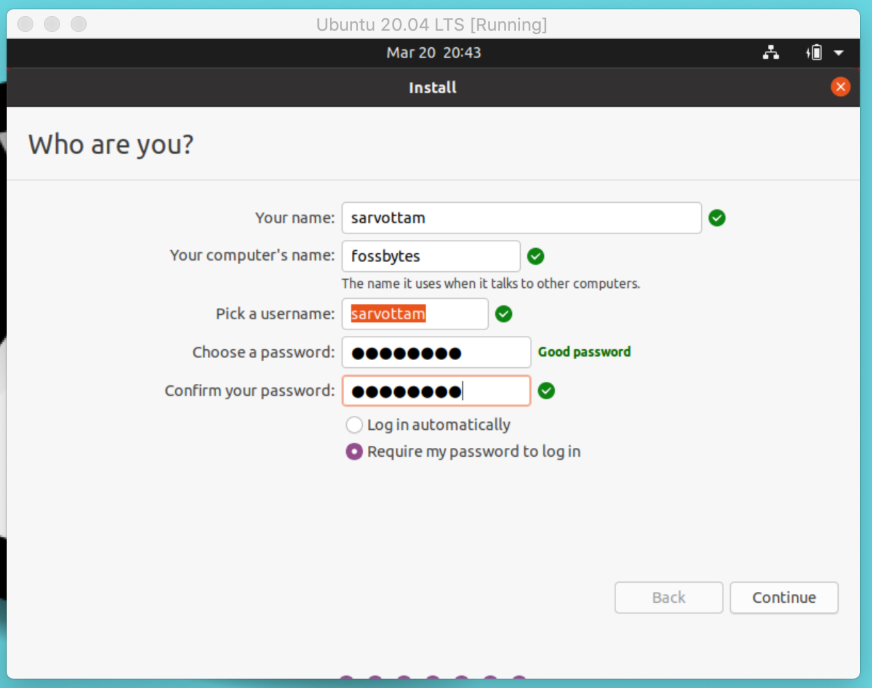
Set your user name and password to log in to the system. Make sure you choose a strong password with alphanumeric characters and symbols.
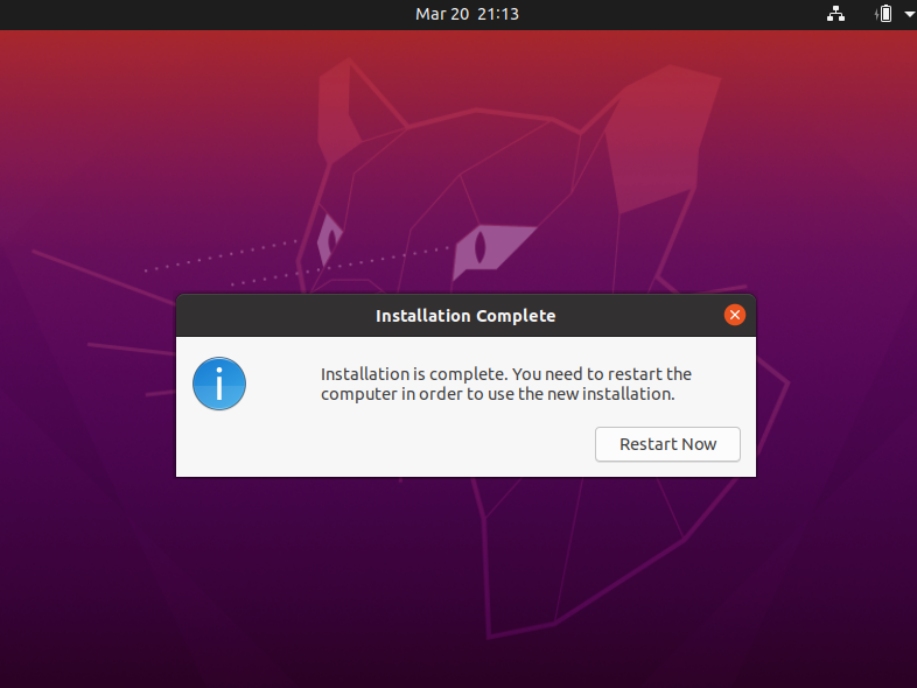
Click Continue and the installation will begin. This can take approximately five minutes. Until then, you can enjoy the slideshow through all the software tools and applications.
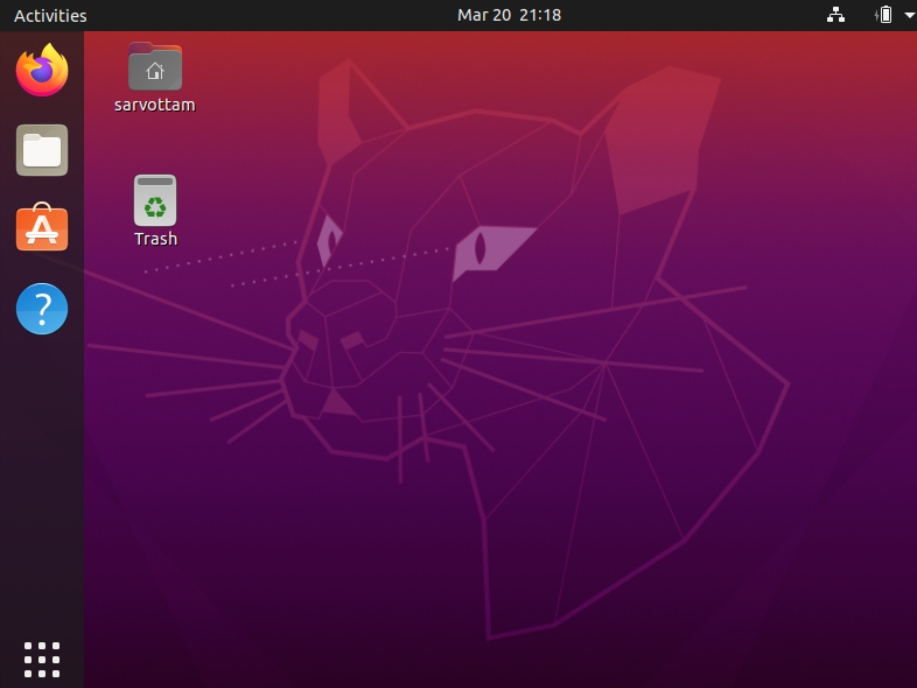
If your installation is completed without an intermediate obstacle, a success notification will appear. You can now reboot and connect to your Ubuntu virtual machine.
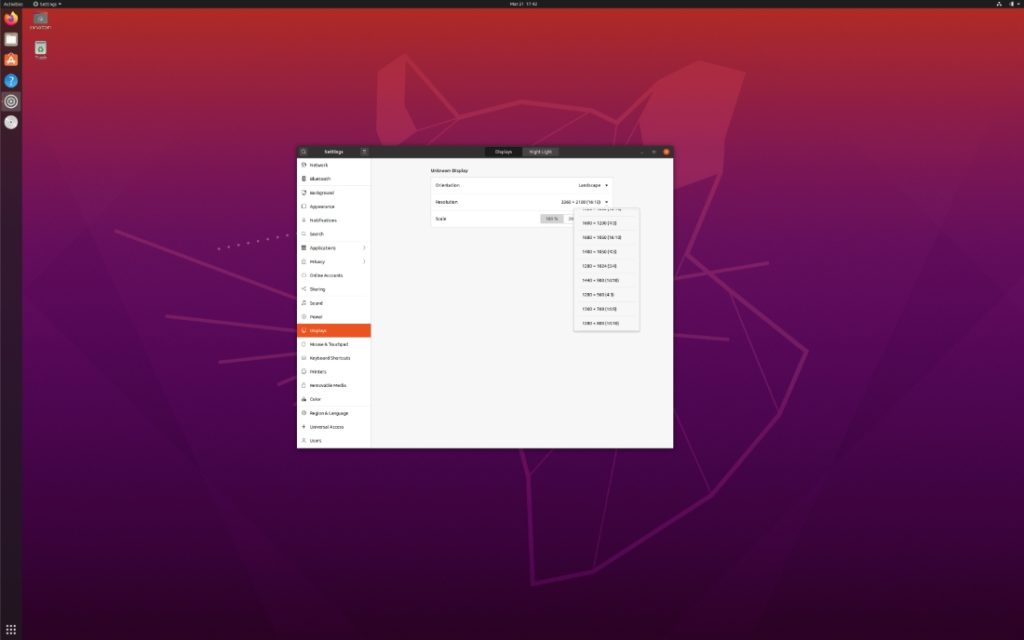
7. Full screen configuration for Ubuntu virtual machine in VirtualBox
After logging in, you may notice that your Ubuntu desktop screen looks small and hides parts of open applications.
Therefore, this step is dedicated to solving small screen problems for Ubuntu in VirtualBox.
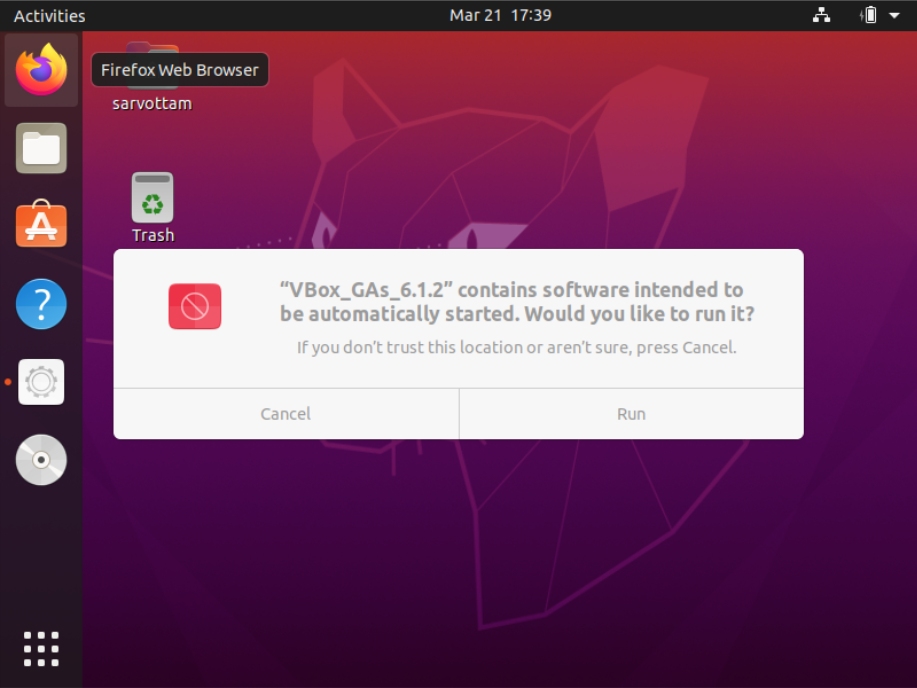
To resolve the issue, you will need to install the Guest Addition software, which includes device drivers and system applications. It essentially helps the Ubuntu virtual machine to integrate more tightly with the host operating system and configure various parameters.
To do the same, go to the menu bar of the Ubuntu virtual machine> devices> insert the CD for guest additions. Click Run to authorize the installation of the VirtualBox Guest Addition software.
This will mount the ISO Guest Additions file inside the virtual machine. You can now go to the menu bar> display> full screen and your desktop will go to the big screen.
For more in-depth screen configuration, you can also access Ubuntu settings and change the resolution accordingly.
Enjoy Ubuntu 20.04 LTS !!!


