


An operating system does its job pretty well when it doesn’t make you want to tear your hair out or run to Google to find out how to do something basic. But the deliberate intuitiveness of systems like MacOS and Windows 10 means that many of the time-saving features aren’t there on the surface, cluttering up the place.
But the fact is that in MacOS, they are invariably just below this surface, begging to be noticed. Here are some shortcuts, tips, and tricks to make your iMac or MacBook even more fluid to use.
Command + drag items out of the top bar
Some applications creep into the command bar, in the series of small icons at the top of the screen, next to the volume, Wi-Fi and Bluetooth controls.
These tend to be harmless, as the clutter goes, but you can remove them by holding down the command button and dragging them out of the bar.
The icons for third-party applications will reappear if the application is reloaded, but you can ban third-party applications if you wish. Do you accidentally get rid of your MacBook’s battery condition? You can restore it in System Preferences> Energy Saver by checking the box “Display the battery status in the menu bar”.
Use Spotlight
Spotlight is the universal search part of MacOS. It can find files on your computer or web pages, and the quickest way to access them is to press Command + Spacebar.
There are also Siri-like intelligence cues, those that don’t make you talk to your computer or hear him speak out loud in public. For example, Spotlight can convert currency, weight and size. It can display recent results and upcoming matches for soccer teams when you enter the team name.
Spotlight is also a quick way to check the definition of a word in the dictionary. Enter this word in the search bar, then press Command + L to get the dictionary entry.
Screenshot
MacOS ‘screenshot feature is, for example, an easy way to save a web page or order confirmation email without having to worry about formatting the page.
There are two types of screenshot style in MacOS. You can drag a rectangle with the cursor to capture only part of the display or capture the entire screen. Command + Shift + 4 will bring up the selection cursor. Alternatively, Command + Shift + 3 snaps the entire view. In both cases, the image automatically ends up on your desktop.
Split screen
One of the reasons to use MacOS instead of an iPad is freewheeling multitasking. But it can leave you awkwardly juggling windows.
The shared display function of MacOS allows you to use a more mobile layout, where two application windows are more or less locked in position on the screen. You can change the amount of screen each one gets, but you won’t see the cascade of windows that many of us usually leave open.
Long press the green “full screen” button at the top left of an application window to launch Split View.
We find this useful in avoiding distractions when, for example, taking notes in an article or website. However, not all apps support Split View, but that means it tends to work fairly well with those that do.
Night mode and dark mode
MacOS has copied phone trends. Apple has added a dark mode in the Mojave and Night Shift version in Sierra.
Dark mode – found in System Preferences, then Displays – transforms menus and interfaces clear, finally, dark. It tends to give “content” like album covers and more prominence, but it can also make your Mac a little overwhelming.
Night Shift – found in System Preferences, then General, then in Appearance – reduces the blue light output from the screen, giving it an orange tint. The idea is that this warmer look puts less pressure on the eyes and can prevent late computer use from ruining your sleep.
Tiny volume increments
MacBooks have some of the best speakers in the laptop world. The MacBook Pro 16 in particular has the most impressive ever seen in such hardware.
This can make it difficult to obtain a completely correct volume level without using the more delicate “analog” volume control in the control bar. But there is another way.
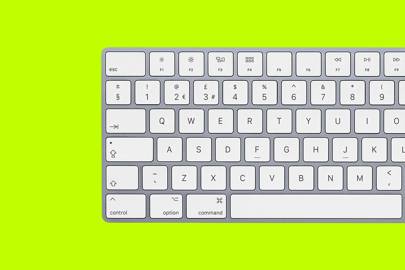
Press ALT + Shift while using the keyboard shortcut keys and each volume block is broken down into four different parameters, for precise control.
Trackpad gestures
A touchpad linked to MacOS can do much more than you imagine. Gestures scroll between applications or bring up the practical daily view screen that many would find very useful, but few use. Here is a summary of the gestures activated as standard:
- A three-finger swipe left or right toggles between applications currently in “full screen” mode.
- Swipe left from the right edge of the touchpad with two fingers to display the notification screen, where reminders and your calendar entries are located.
- Swipe up with three fingers to access the Mission Control multitasking screen.
- Pinch with three fingers and your thumb to directly access the Launchpad app screen.
- Pinch upside down with three fingers and your thumb to see your desk.
- Slide your finger left and right with two fingers to scroll through the pages of a book / document or go back / forward in a browser.
These gestures can be disabled and the required gesture modified in the Trackpad> More gestures part of the System Preferences.
Sidecar (second screen for iPad)
This is a new feature for MacOS Catalina. Sidecar lets you use your iPad as a second screen for your MacBook or iMac.
Both must be connected to the same Wi-Fi network or using a USB-C cable. You may see some delay when using wireless Sidecar, but the performance with a good network is excellent.
You will find the Sidecar connection option in System Preferences when running MacOS Catalina. However, not all Mac and iPad are compatible. You need a MacBook Pro from 2016 or newer, an Air from generation 2018, one from MacBook 12 inches or an iMac from 2015 or newer. Many older materials are excluded.
Use a guest account for device loans
Definitions of what constitutes a joke vary. A friend may find it fun to rename this vacation photo folder on your desktop as a very specific brand of pornography. Your partner may not understand the joke, falling for it later.
Logging in as a guest is the obvious solution. MacOS lets you set up a guest account that has its own desktop and exactly the amount of access you want to provide. User accounts are created and modified in System Preferences> Users and Groups.
All the files that the “guest” then leaves in their personal folder are deleted when the user logs out. And in the Parental Controls section of the account setup page, you can specify which apps they can run and set the hours and times they use the account – handy for kids.
Hot corners
MacOS hot spots are much less important than they used to be and, in our MacBook test at least, are not enabled as standard. These are gestures that are engaged when the cursor is placed in an extreme corner of the screen.
You can use it to display the screen saver, put the screen to sleep, or another way to access parts of the user interface like Mission Control, Launchpad, or the Notification Center.
Head to System Preferences> Desktop and Screen Saver, select the Screen Saver tab, then Hot Corners to start with these quick gestures (if sometimes irritating).
More beautiful WIRED stories
Énorme A huge Airbnb scam takes control of London
? Thinking of buying an electric car? Read this first
? Why do modern tomatoes taste so bad?
? How Slack ruined the job
? Follow WIRED on Twitter, Instagram, Facebook and LinkedIn


