


Quick links
- Create Bootable Windows 10 USB on Mac Using PassFab 4Winkey
- Manually Create a Bootable USB Using Terminal
Creating a Windows bootable USB drive is easy on a Windows PC, but what if you want to create one on a Mac? Here we will teach you two unique methods to create Windows 10 bootable USB on your Mac.
1. Create Bootable Windows 10 USB on Mac Using PassFab 4Winkey
The easiest way to create a Windows bootable USB drive on your Mac is to use PassFab 4WinKey. The application is designed to help you recover a Windows account that you have been locked out of. However, an added benefit is that you can also use it to create a Windows USB bootable disk without Boot Camp.
The advantage of using 4WinKey is that you don’t need to download the Windows ISO separately: the application does this automatically for you. Therefore, all you have to do is plug in your USB drive and the app does the rest.
PassFab4 WinKey is available in Professional, Enterprise, and Ultimate versions, but you can opt for a 30-day free trial. The trial version will allow you to create a bootable disk, which should be sufficient for this task. If you want to use its additional features, such as Windows Account Recovery, you will need a premium subscription which starts at $27.95 per month.
Make sure you have a USB drive with at least 16 GB of space to create the bootable disk. Since you will need to format the USB drive, make sure you have backed up all important data before continuing.
Follow these steps to create a Windows bootable USB disk using PassFab 4WinKey:
- Download PassFab 4WinKey and open it on your Mac.
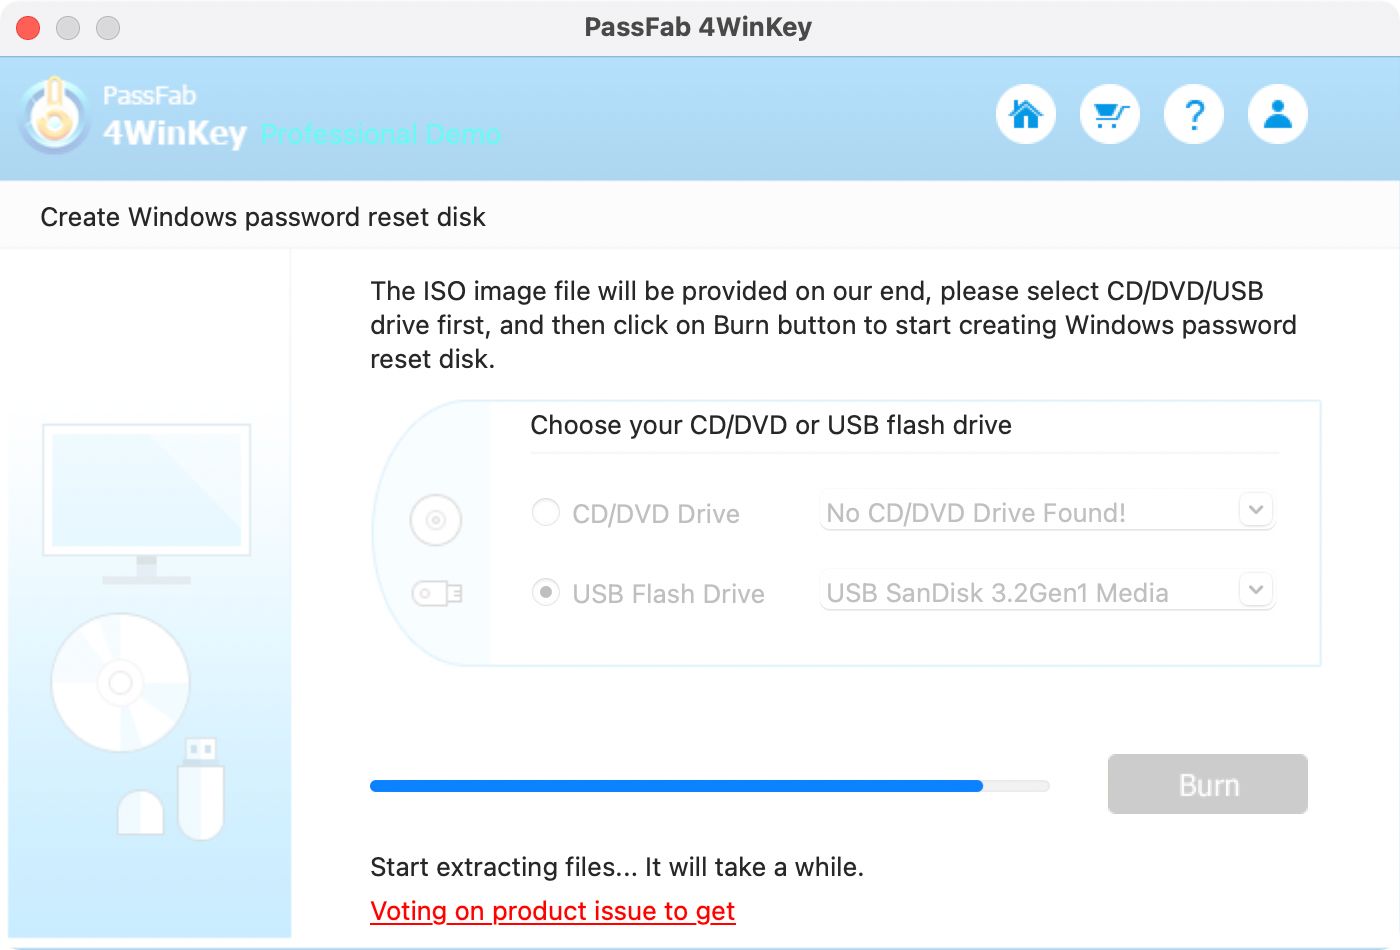
- Plug in your USB drive. PassFab 4WinKey should detect it automatically. Check if the correct drive is selected and click Burn.
- Since the process involves downloading the Windows ISO, it may take a while, depending on your internet connection.
- You will receive a confirmation message once the operation is complete, along with instructions on how to boot a Windows PC to the recovery disk.

That’s it! You can now use the startup disk to reinstall a new version of Windows on your PC or Mac.
PassFab 4WinKey
PassFab 4WinKey is one of the best tools available for resetting Windows 10 passwords. Need to remove or create a Windows account? This tool is here for you.
- Easy to use for beginners and advanced users
- A single click can create a bootable Windows 10 reset disk
- Helpful support and excellent step-by-step tutorials
- A reliable choice for all users
- Version-specific functions
- Free trial available only on PassFab 4WinKey website
2. Manually Create a Bootable USB Using Terminal
You can also download the ISO file and manually create an installer using the Terminal app on your Mac. Before continuing, make sure to install Homebrew on your Mac, as you will need it for the later steps.
- Head over to the Windows 10 download page and get the ISO file after selecting your edition and language.
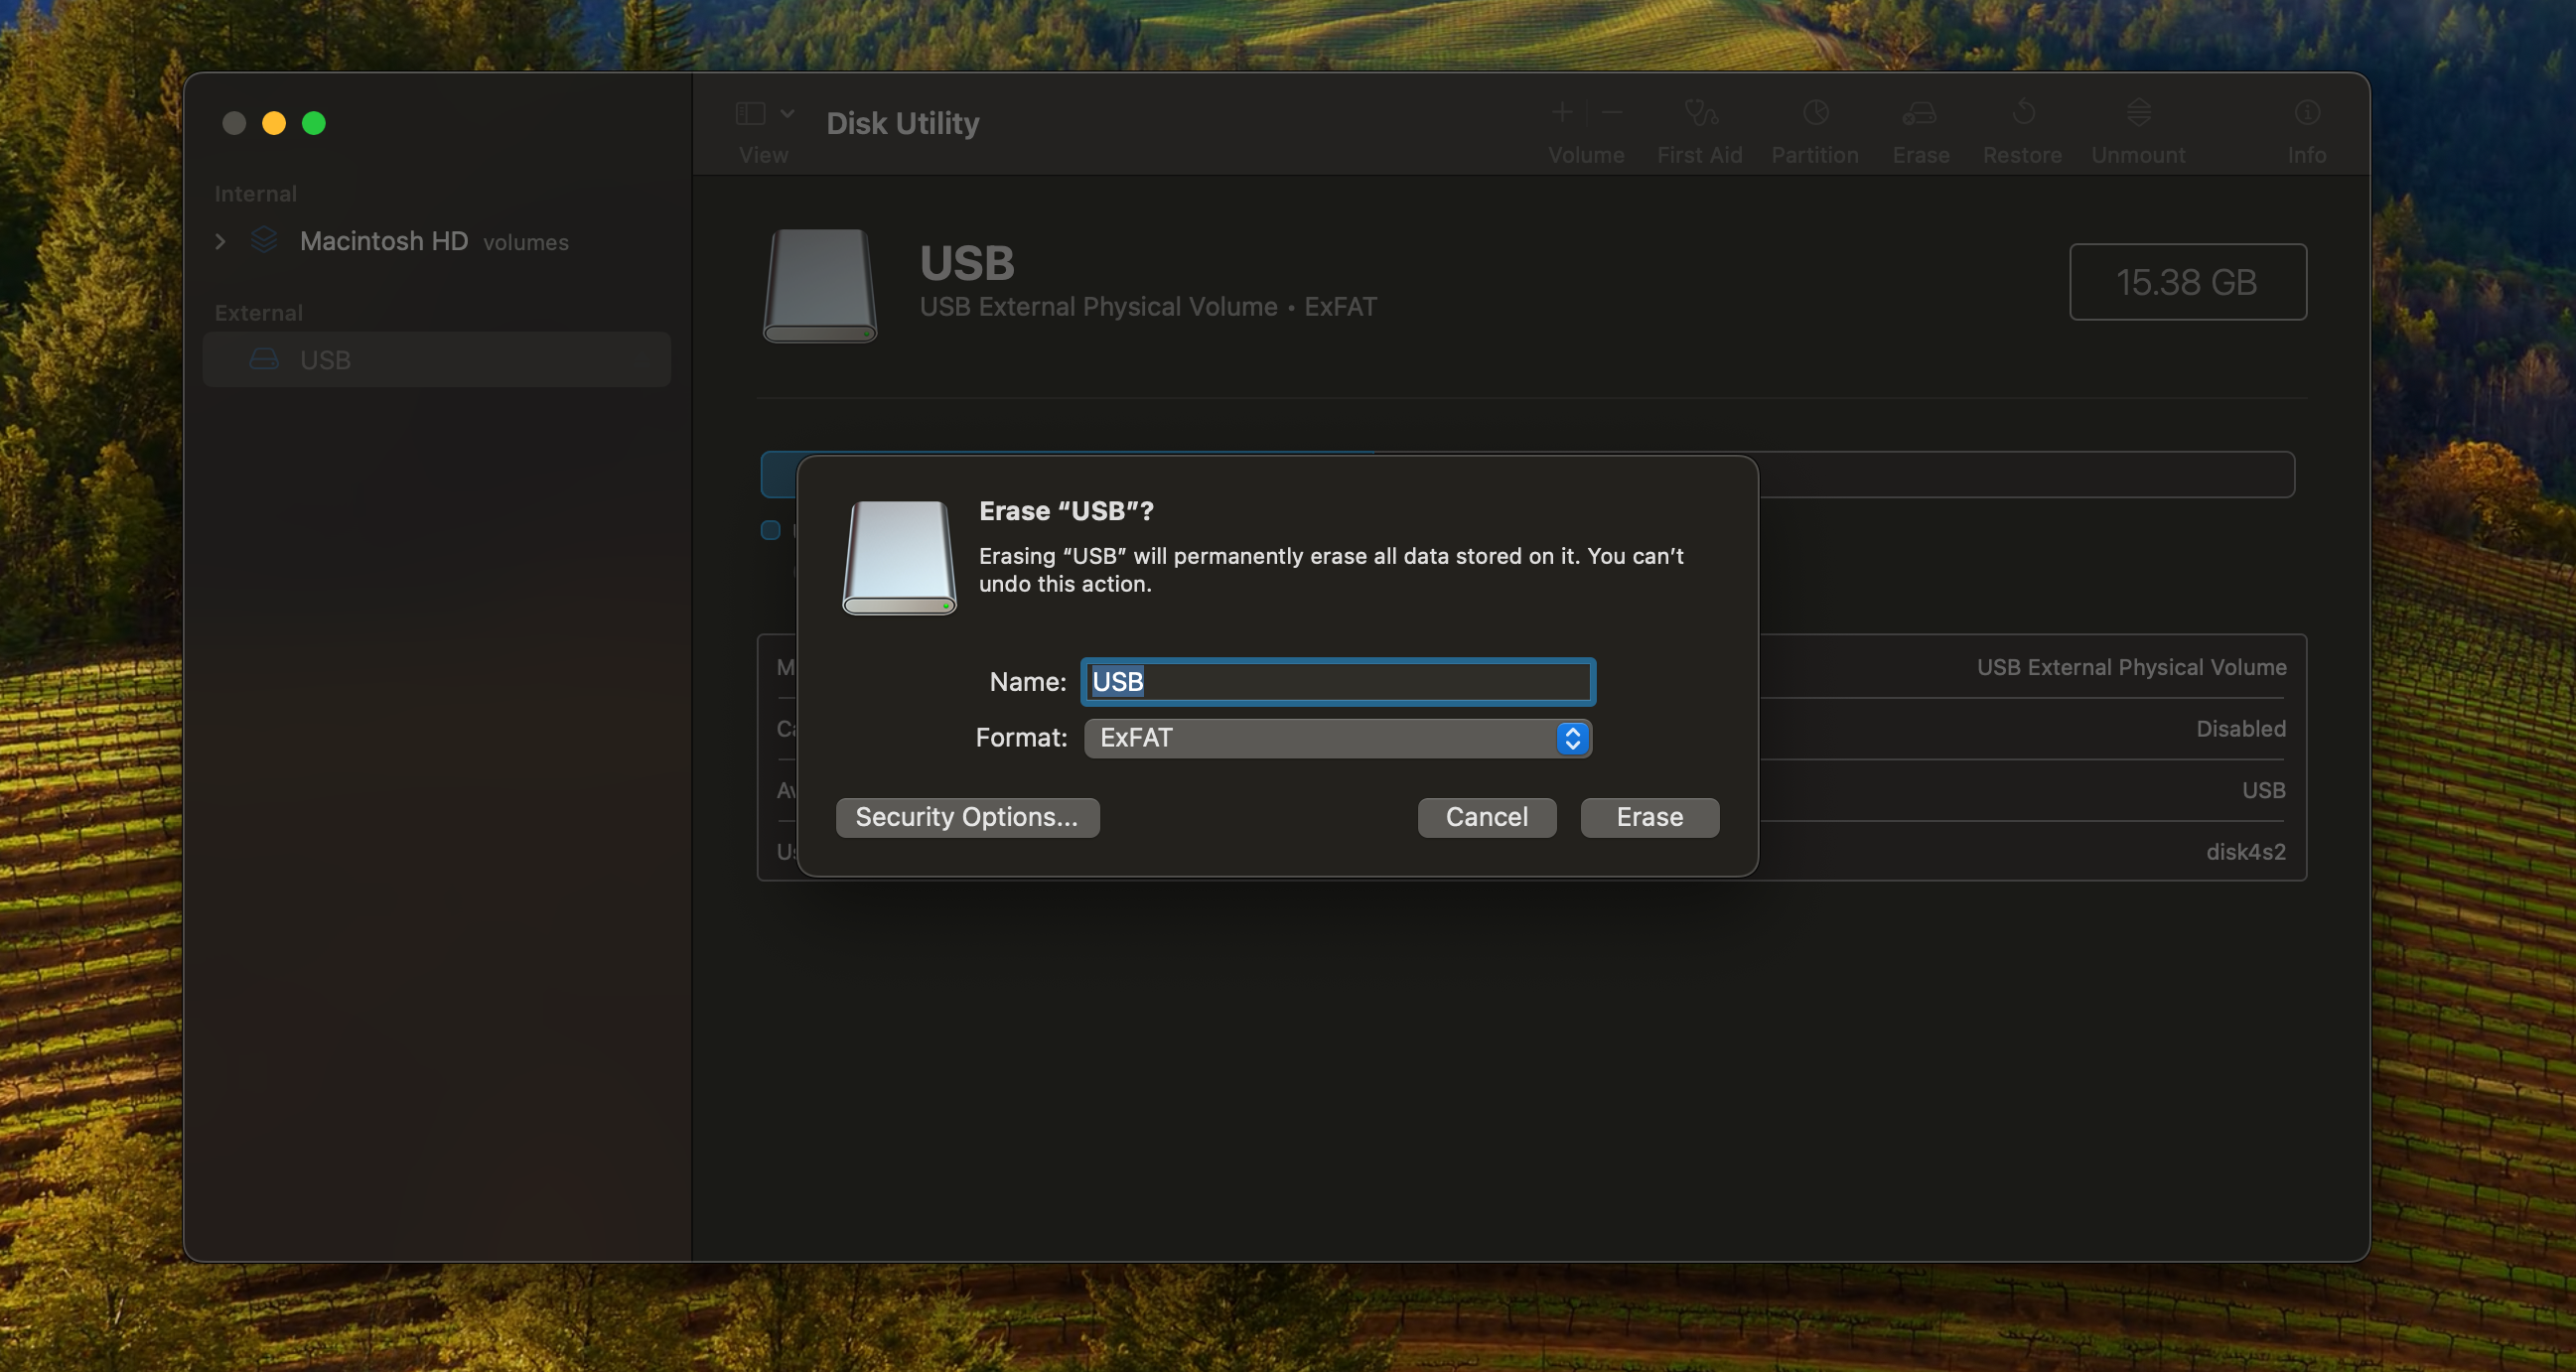
- Open Disk Utility on your Mac from Applications > Utilities case. You can also use Spotlight search on your Mac to find it.
- Select your USB key in the left sidebar, then click To erase in the upper right corner.

- Give it the name of your choice and select ExFAT as the Format. Then click To erase.
- Now you need to mount the ISO file so that you can copy its contents to your USB drive. Open Terminal on your Mac and enter the following command:
hdiutil mount ~/Downloads/Win10_22H2_English_x64v1.isoMake sure to replace the path of the ISO file with where you stored it. In most cases, it will be located in your Downloads folder.
- You will now need to install wimlib. Run the command below to do this.
brew install wimlib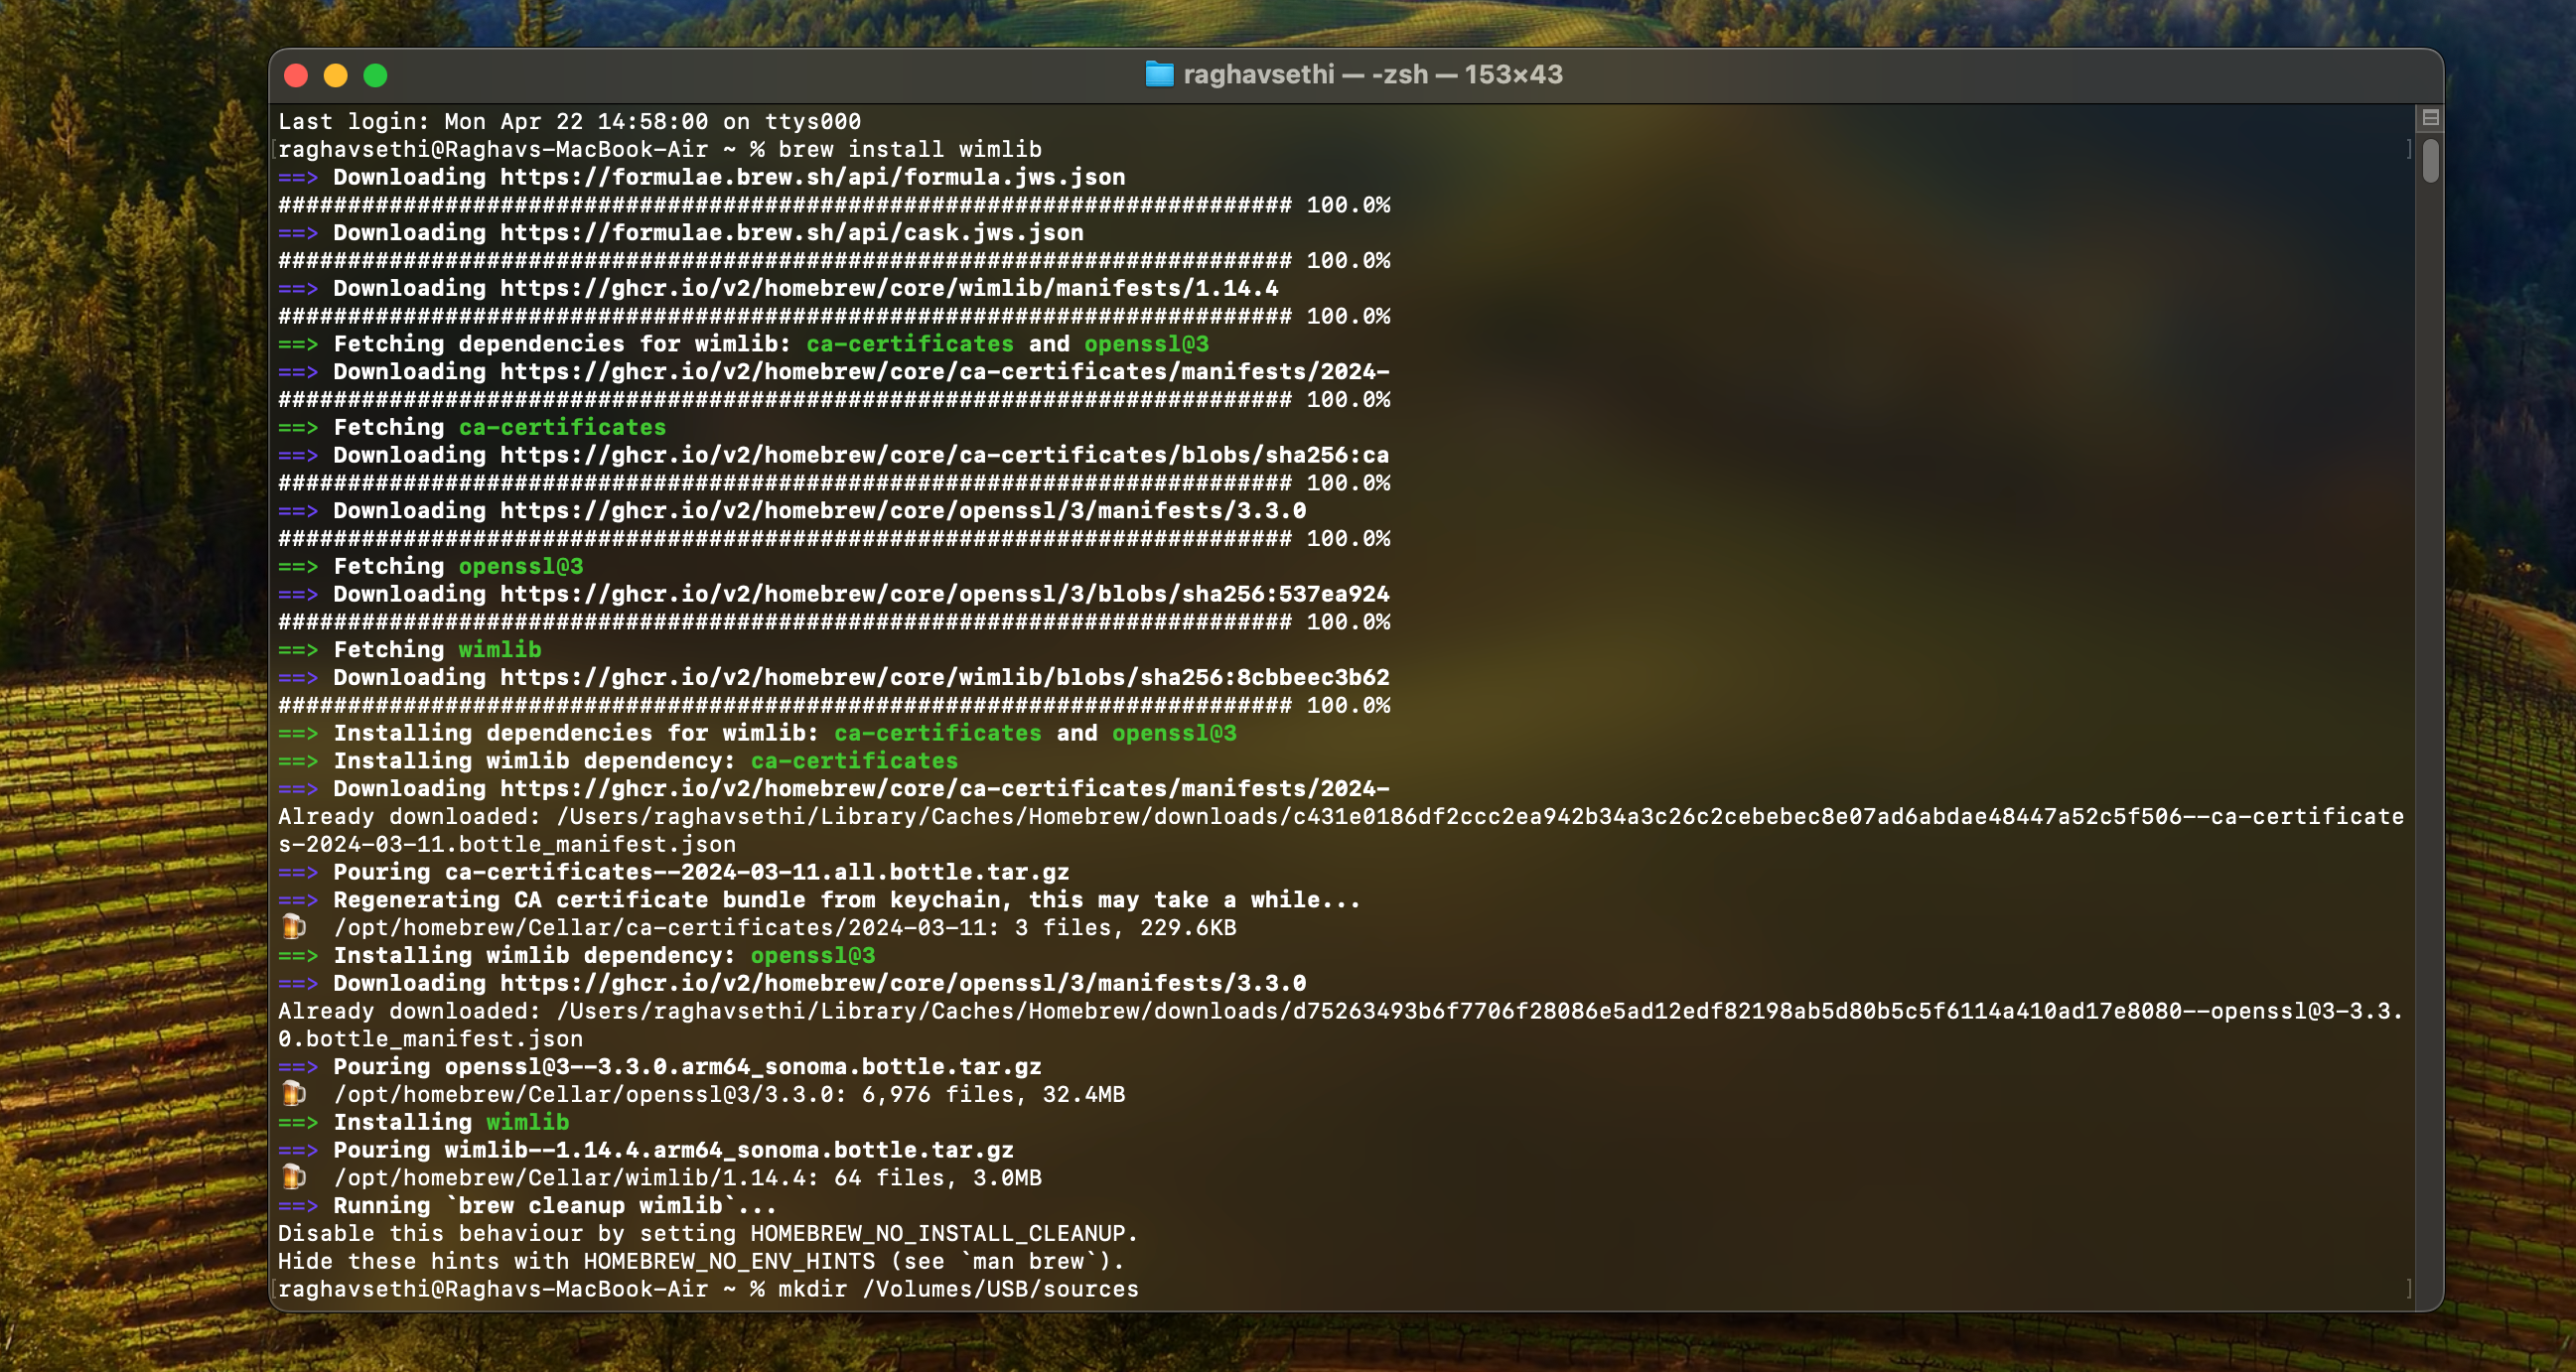
- Next, type the following command to create a folder named sources in the root directory of your USB stick. Be sure to replace USB with the name you gave to your USB key when formatting it.
mkdir /Volumes/USB/sources - Since you cannot copy a file larger than 4 GB to a FAT32 formatted drive, you will need to split one of the files into two parts. Remember that this command may take some time, so be patient.
wimlib-imagex split /Volumes/CCCOMA_X64FRE_EN-US_DV9/sources/install.wim /Volumes/USB/sources/install.swm 3800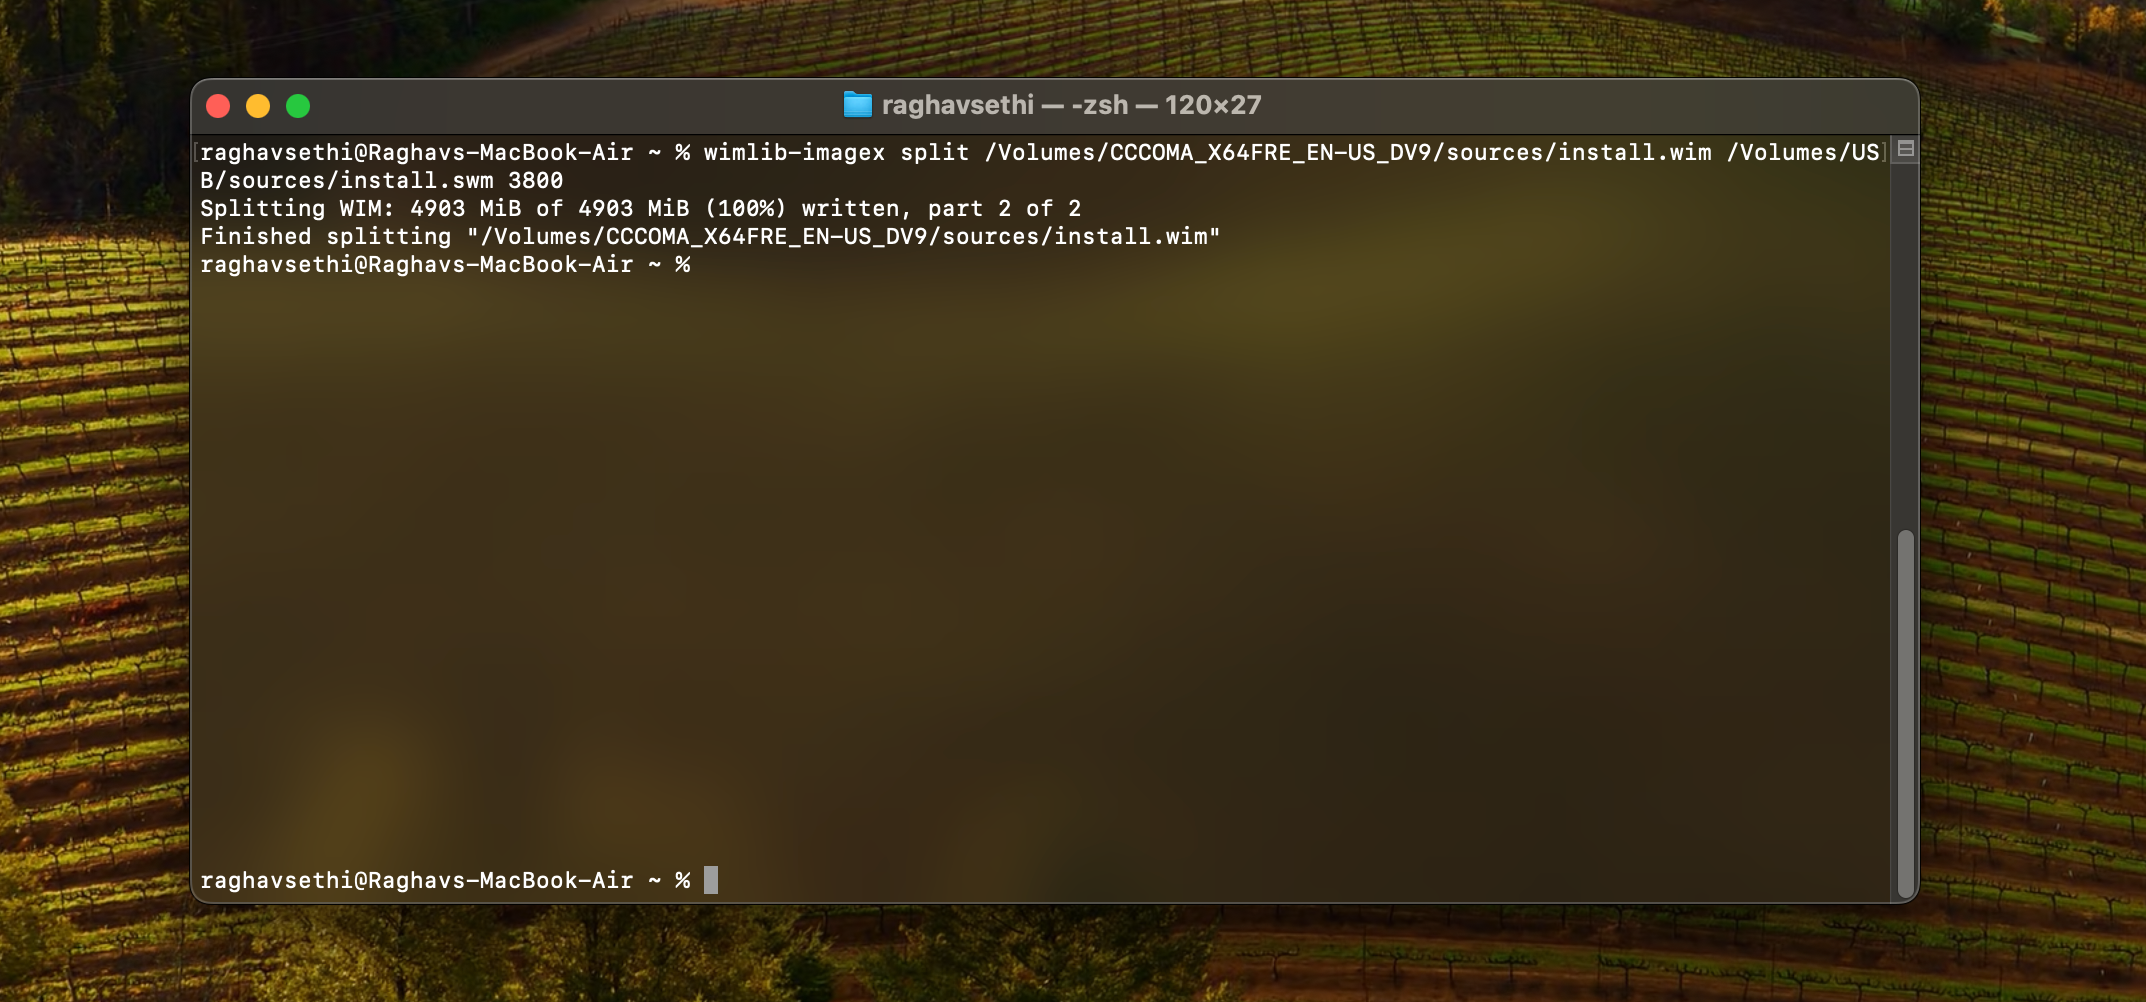
- Finally, you can copy the remaining files by running this command:
rsync -vha --exclude=sources/install.wim /Volumes/CCCOMA_X64FRE_EN-US_DV9/* /Volumes/USB


Your bootable USB drive is now ready and you can boot into Windows Setup on your PC.
Creating a bootable Windows 10 USB on a Mac is definitely not as easy as on a PC. Fortunately, you can use any of the methods described here to create a bootable Windows USB drive in minutes. Choose the method that best suits your expertise to complete your Windows installation or recovery tasks on your Mac.
This is a sponsored post. Product choices and opinions expressed in this article are those of the sponsor and do not reflect the editorial direction of MakeUseOf or its staff.